Raids Guide: Locations, Difficulties, & Requirements
DanielD • Updated June 7, 2025
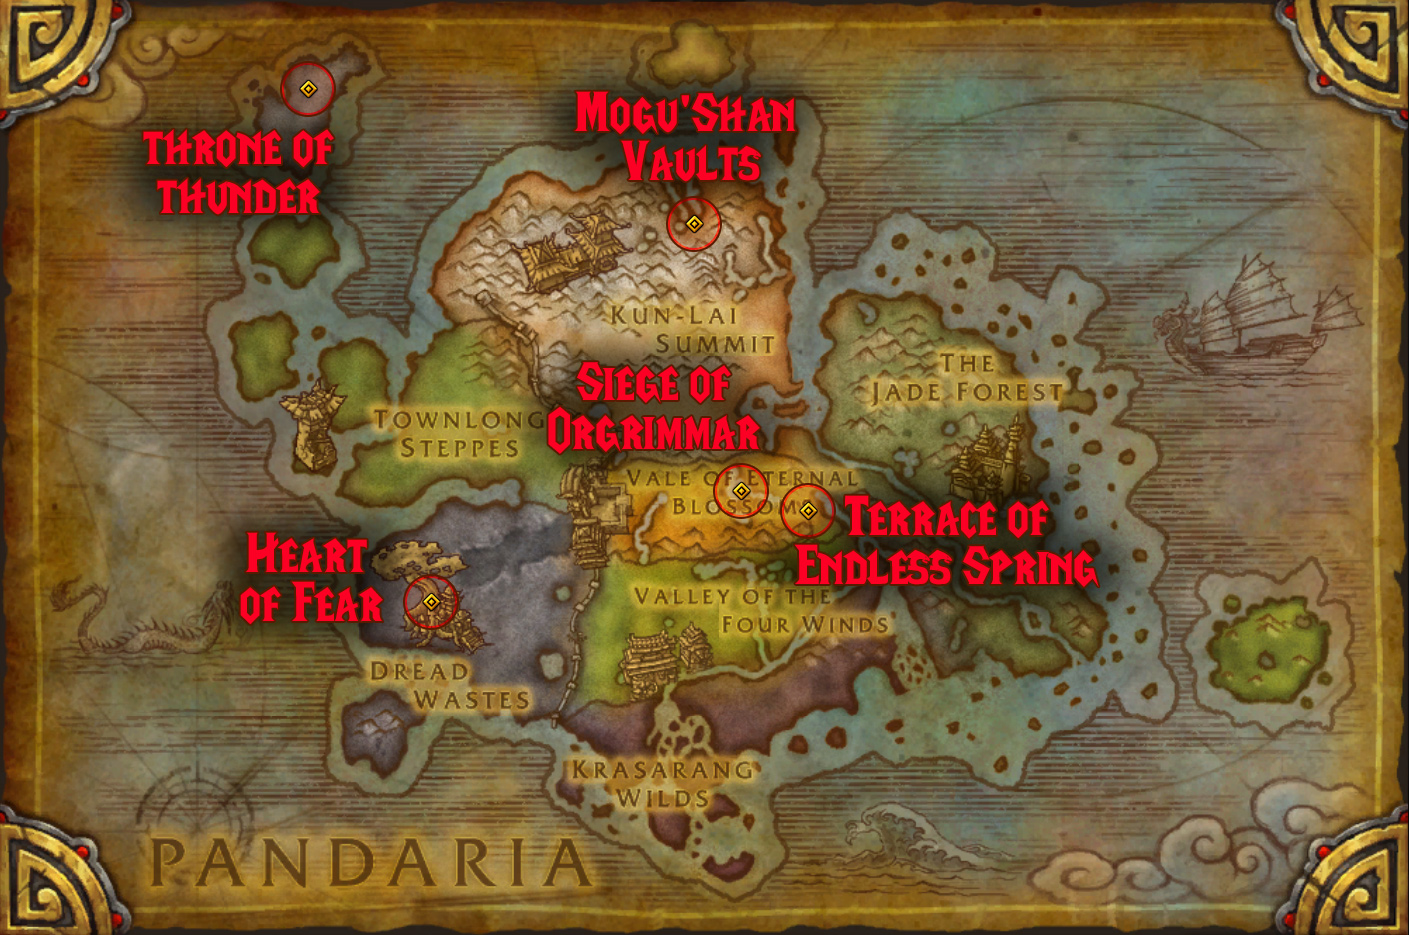
Welcome to our guide on the Mists of Pandaria raids! Every raid is listed, along with all the relevant information on each instance. This guide also includes detailed maps that indicate the entrance to each instance.
Raid Sizes & Difficulties
All of the Mists of Pandaria Raids have Raid Finder, Normal, and Heroic versions. The Siege of Orgrimmar raid also offers Flexible raiding.
Raid Finder difficulty has not yet been implemented in WoW Classic as of the last phase of Cataclysm, despite originally launching with the Dragon Soul raid. It will most likely make it into the game for the Mists of Pandaria expansion, however. This difficulty can only be accessed through the Group Finder tool and can only completed with a 25-player raid size.
Normal and Heroic modes require premade groups of either 10 or 25 players. Heroic mode is the hardest raid difficulty in Mists of Pandaria, with Mythic difficulty not being added to the game until the Warlords of Draenor expansion.
Flexible mode was added in the last tier of Mists of Pandaria for the Siege of Orgrimmar raid, offering an additional level of difficulty between Raid Finder and Normal that could be tackled with any number of players between 10 and 25. In Warlords of Draenor and beyond, Flexible raids were removed as a separate difficulty level and this scaling system was instead applied to Raid Finder, Normal, and Heroic difficulties. There’s no word yet on whether we will get Flexible raids in Mists of Pandaria Classic or which version they will be.
| MoP Raid | Players | Raid Finder Item Level Required |
|---|---|---|
| Mogu’Shan Vaults | 10/25 | 460 |
| Heart of Fear | 10/25 | 470 |
| Terrace of Endless Spring | 10/25 | 470 |
| Throne of Thunder | 10/25 | 480 |
| Siege of Orgrimmar | 10/25 | 496 |
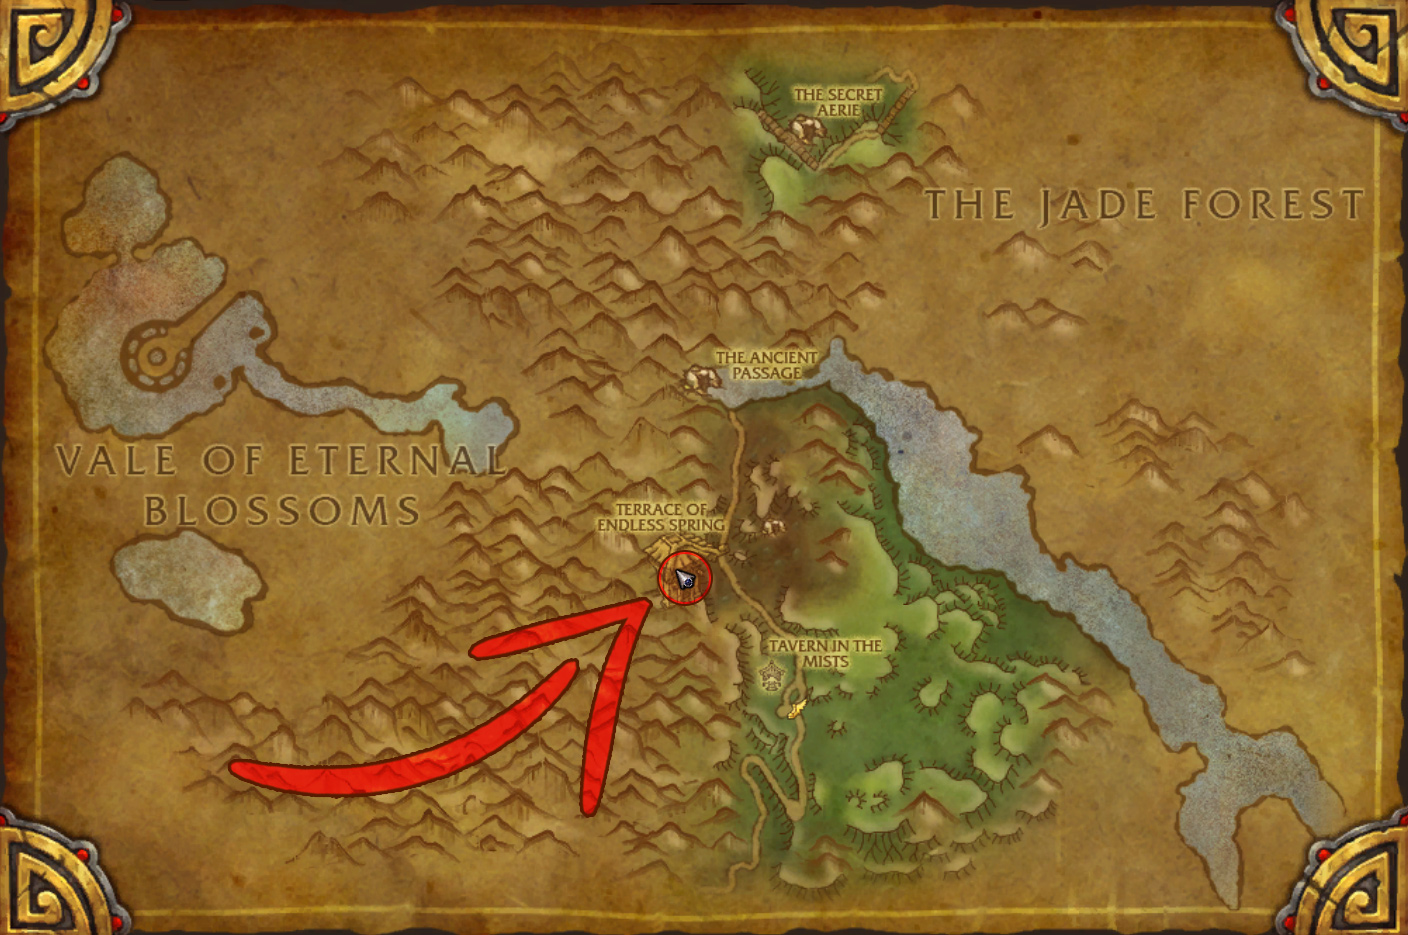
Instance Locations
All of the raid entrances for Mists of Pandaria are located in the continent of Pandaria, even the Siege of Orgrimmar raid which takes players into an instanced version of the Horde city of Orgrimmar.
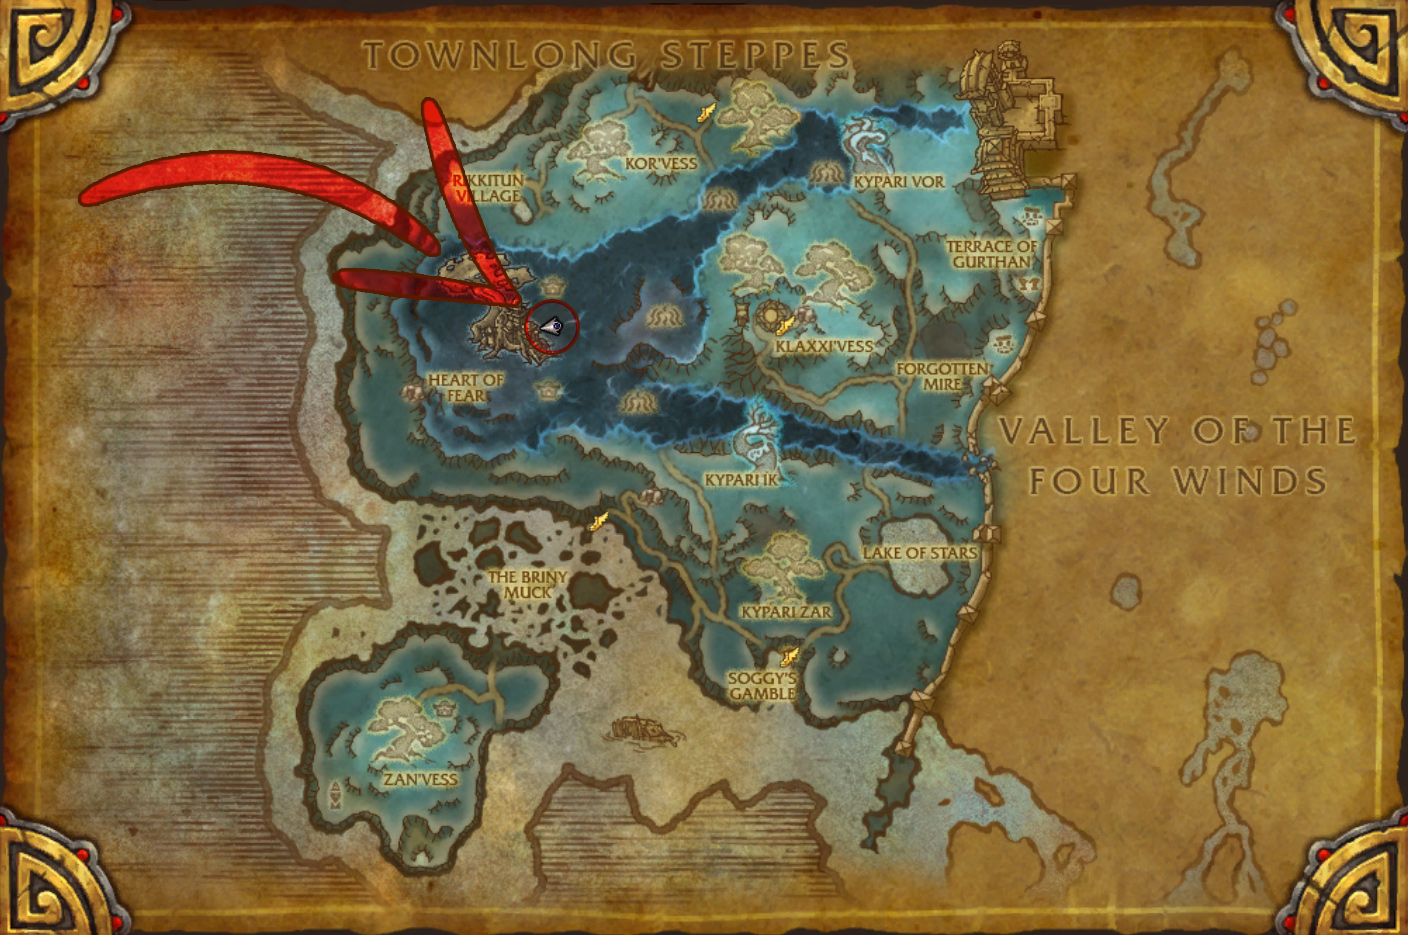
- Dread Wastes
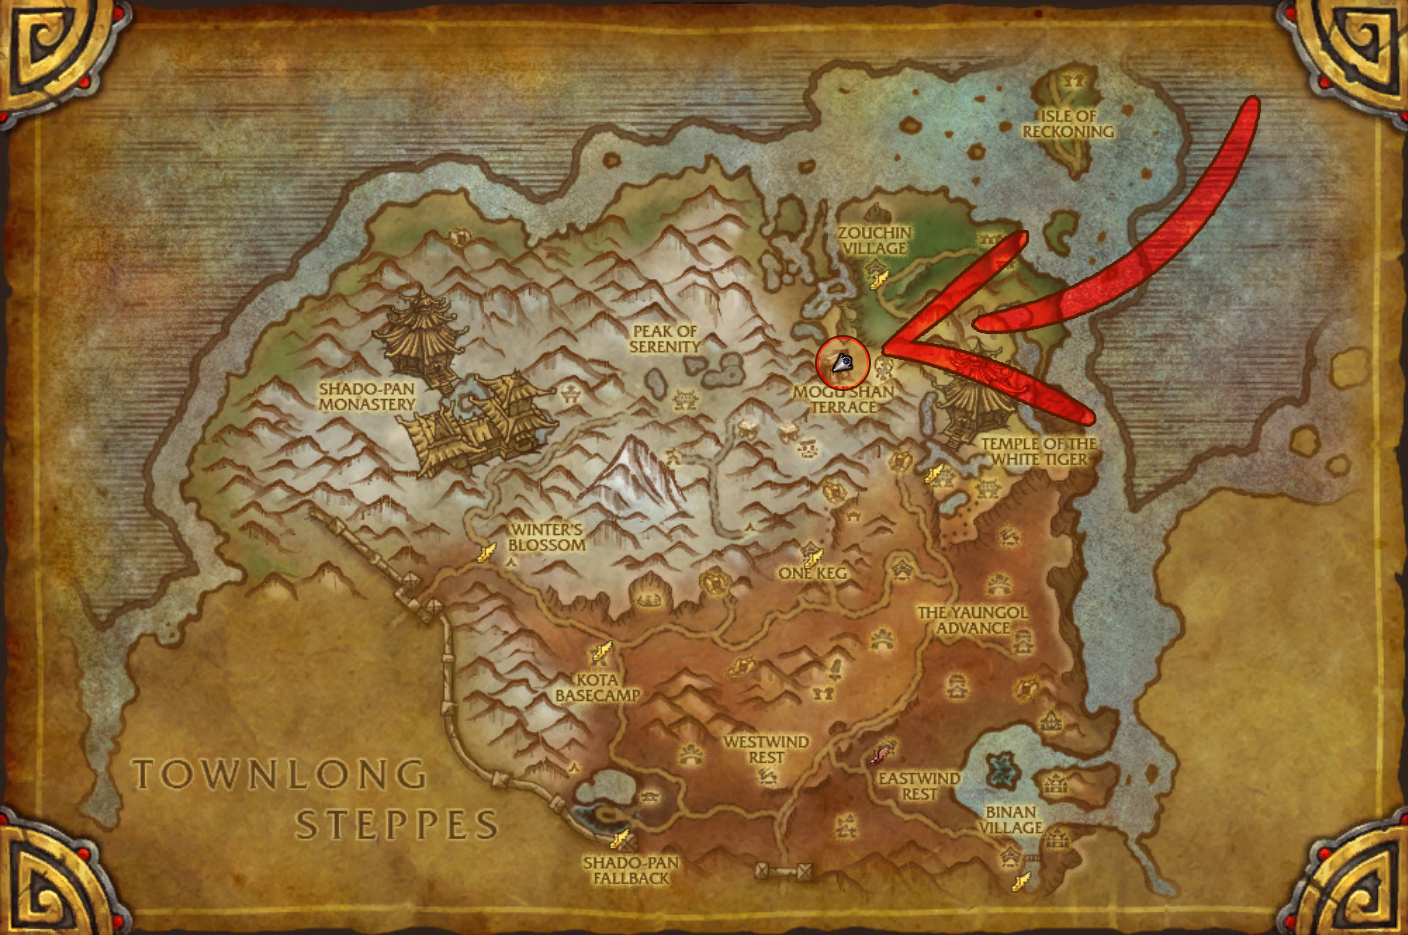
- Kun-Lai Summit
- Isle of Thunder
- The Veiled Stair
- Vale of Eternal Blossoms
Raid Descriptions & Info
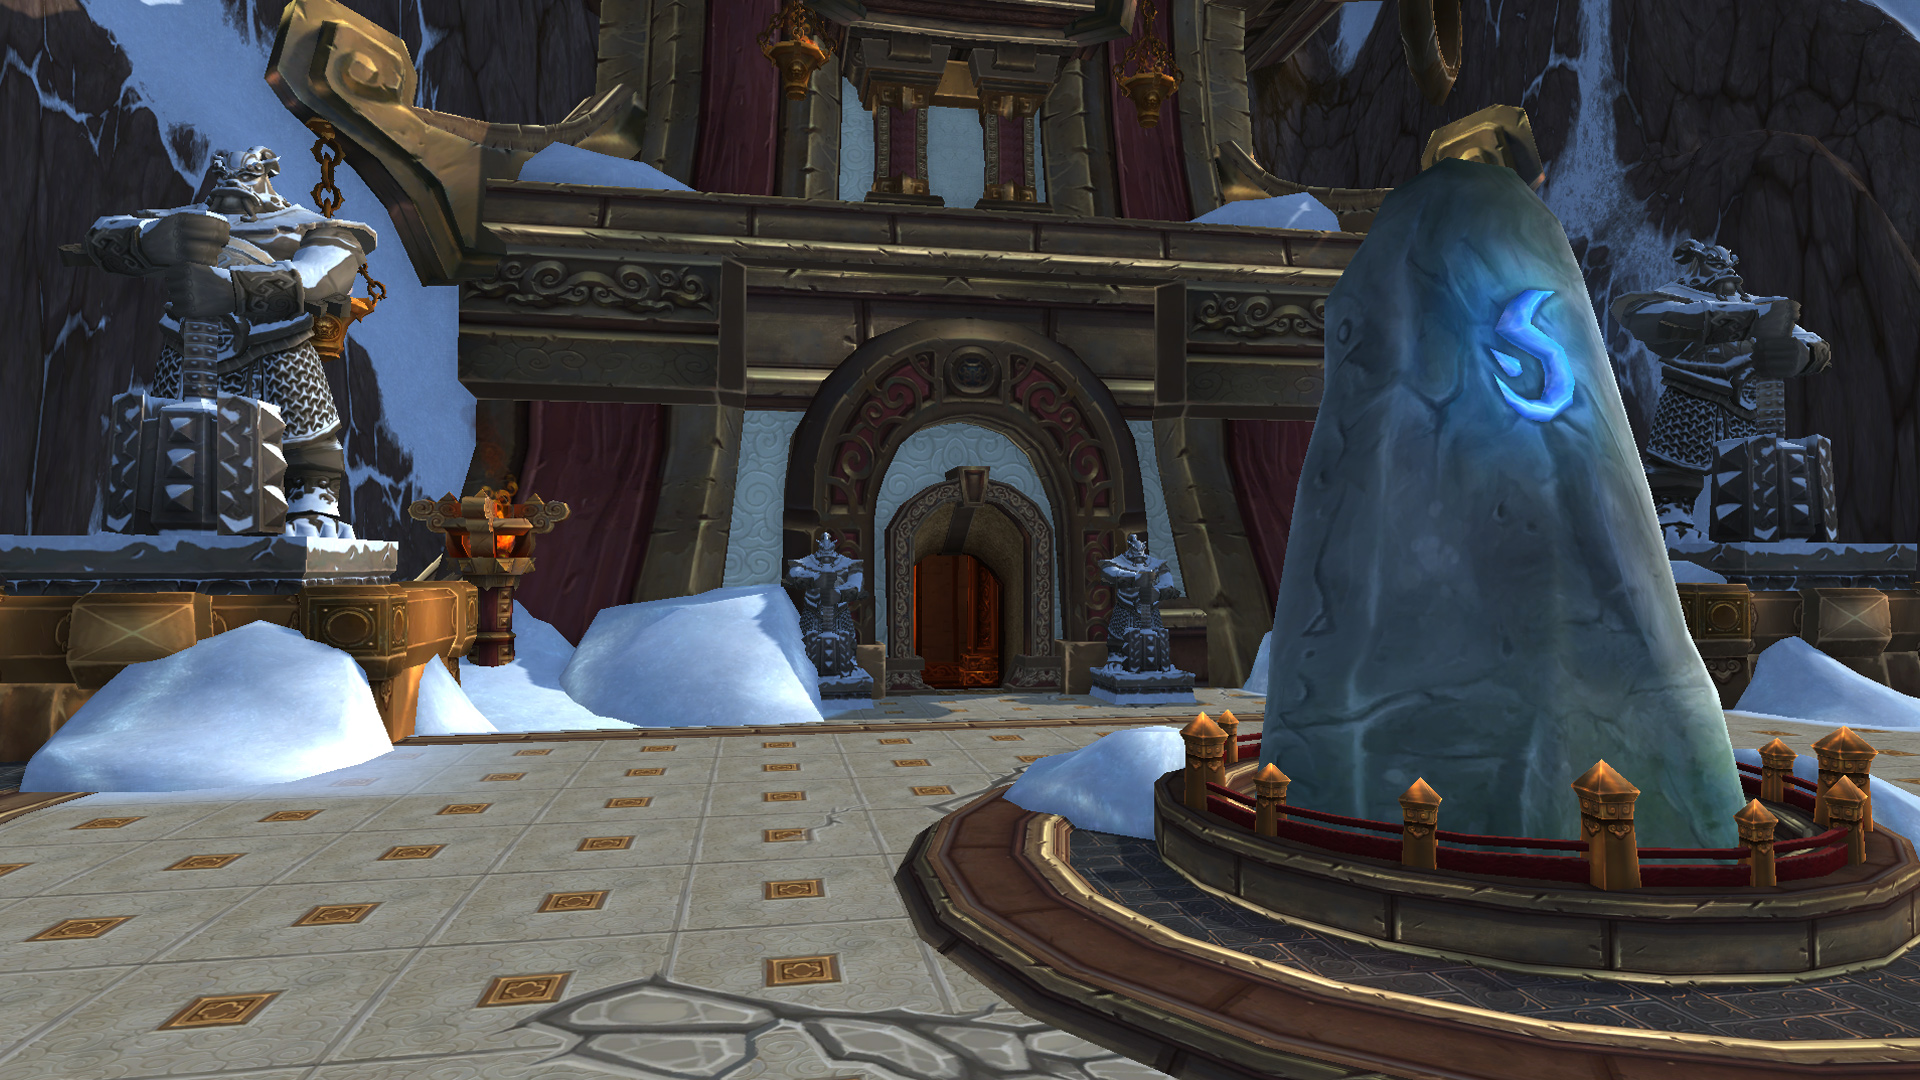
Mogu’Shan Vaults
- Players: 10/25
- Raid Finder Item Level Required: 460
An ancient complex buried beneath Kun-Lai Summit, the Mogu’shan Vaults are a repository of mogu secrets and powerful artifacts. Now, they’ve been unearthed, and the mogu’s constructs and spirits stand guard over its halls.
The raid begins with the The Stone Guard, a quartet of guardian constructs that must be managed carefully to prevent energy overloads. Feng the Accursed, a spirit-infused mogu warlord, cycles through different elemental stances, changing his attack patterns mid-fight. Gara’jal the Spiritbinder forces players into the spirit realm, where they must deal with shadowy minions before returning to the physical plane. The Spirit Kings, four mogu warlords, fight in succession, each bringing distinct abilities such as deadly charges, deadly traps, and possession-based mechanics. Elegon, an arcane celestial dragon, creates collapsing energy platforms that disappear mid-fight, forcing players to reposition. The final boss, Will of the Emperor, features a unique battle against an army of mogu constructs and elite warriors, with players needing to counter the Emperor’s Devastating Arc attacks by dodging them in specific directions.
Heart of Fear
- Players: 10/25
- Raid Finder Item Level Required: 470
The stronghold of the mantid empire, Heart of Fear is located deep in the Dread Wastes. The raid centers around the corruption of Grand Empress Shek’zeer and her loyal swarm.
The encounter begins with Imperial Vizier Zor’lok, who uses powerful sound-based abilities, forcing players to avoid devastating sonic waves. Blade Lord Ta’yak tests movement skills with powerful wind-based attacks and a deadly maze-like gale phase. Garalon, an enormous mantid beast, requires players to target his massive legs while dealing with his persistent Pheromones debuff. Wind Lord Mel’jarak, the mantid commander, leads elite warriors that must be carefully controlled and defeated in the correct order. Amber-Shaper Un’sok transforms players into constructs, forcing them to manage their own actions while fighting the boss. The final battle against Grand Empress Shek’zeer sees her unleashing waves of Sha-infused minions and deadly psychic attacks, escalating into a chaotic final phase where her corruption overtakes the battlefield.
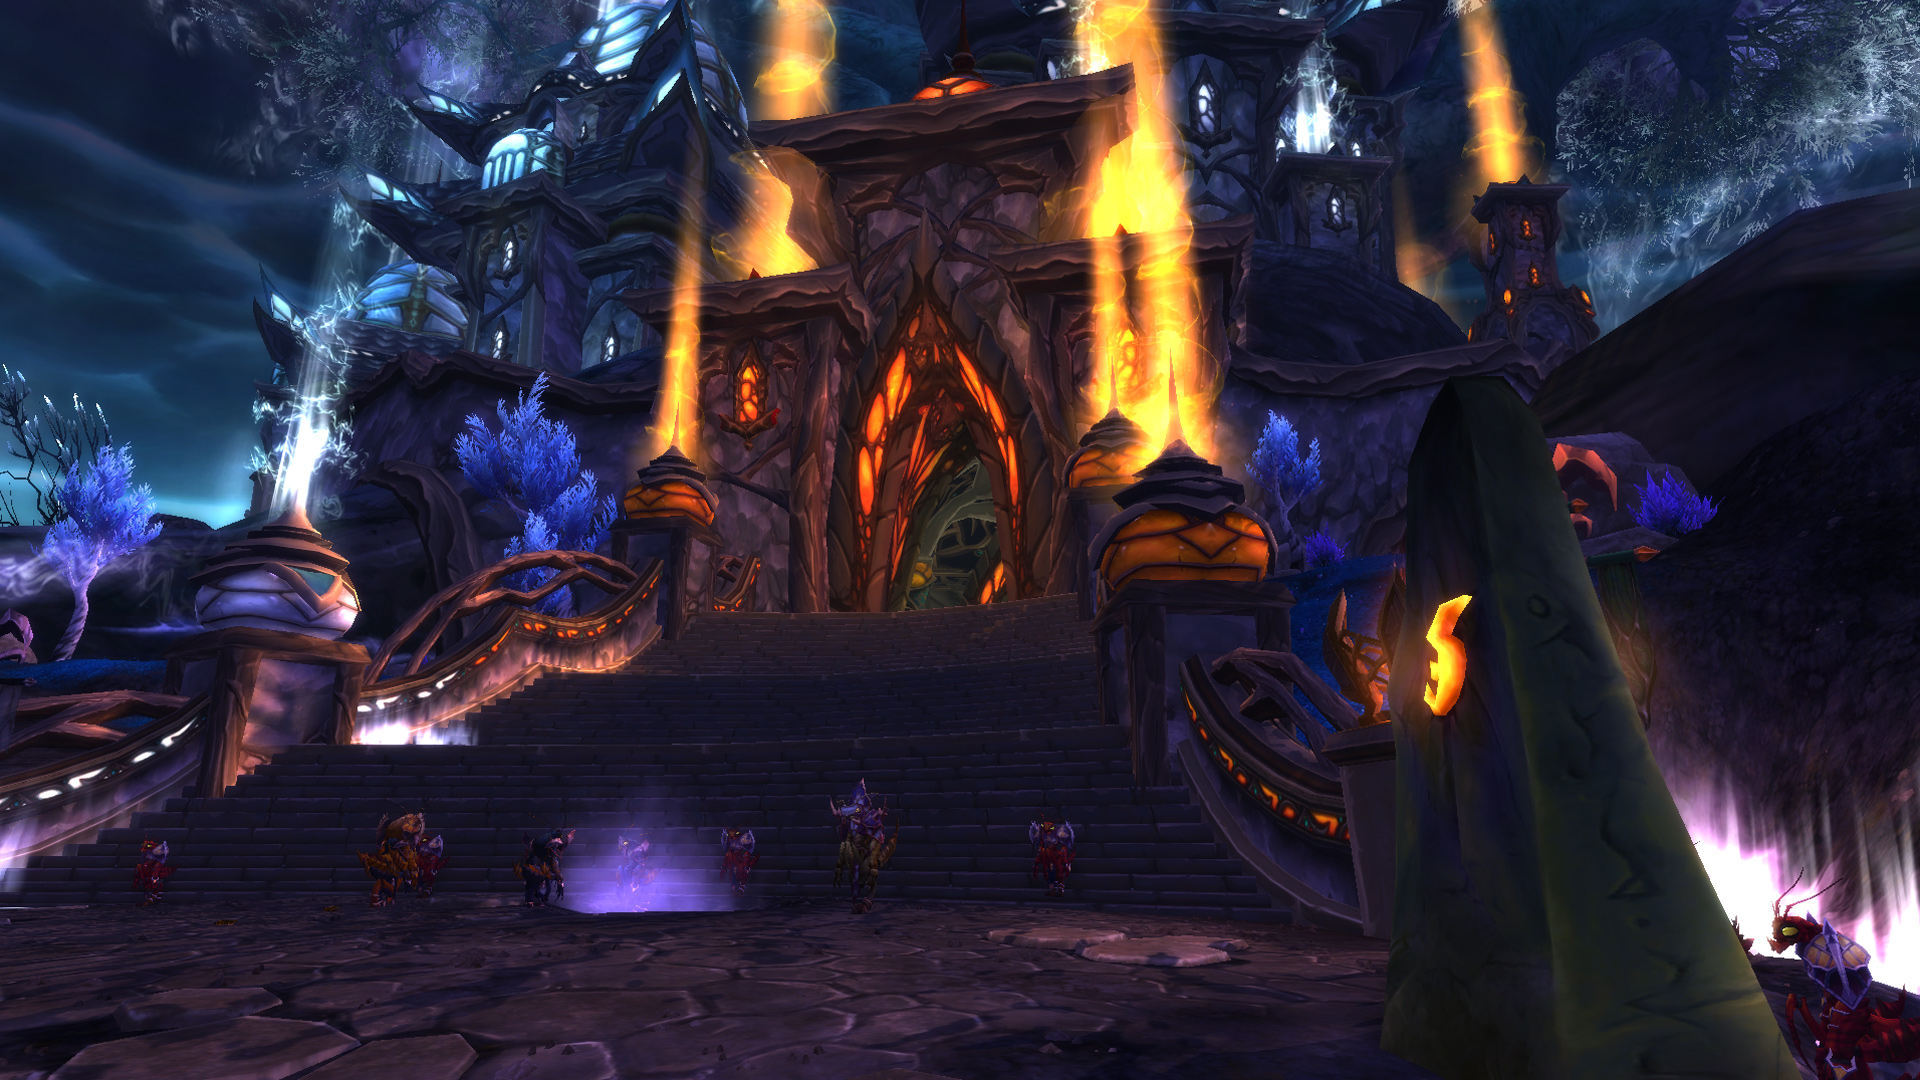
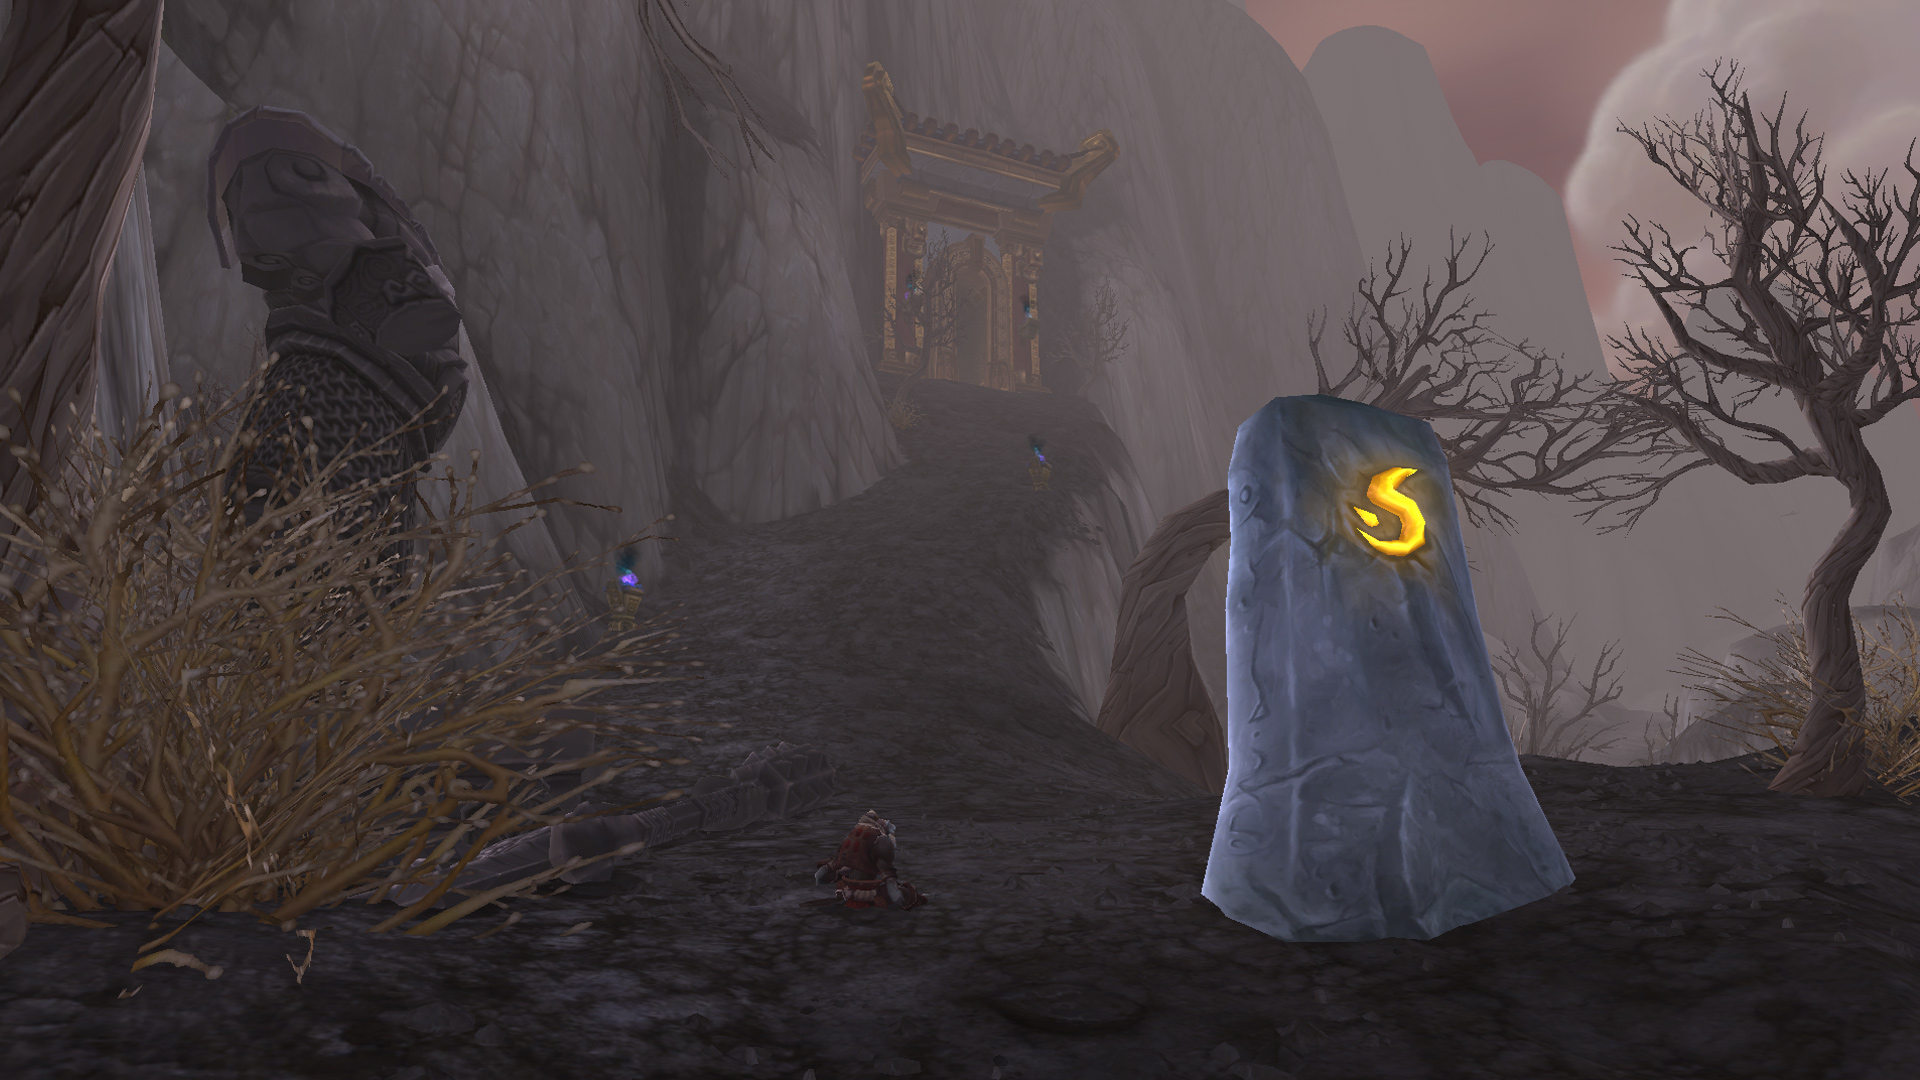
Terrace of Endless Spring
- Players: 10/25
- Raid Finder Item Level Required: 470
The Terrace of Endless Spring, a sacred Pandaren sanctuary, has fallen to the Sha’s influence.
This four-boss raid begins with the Protectors of the Endless, three guardians corrupted by dark forces, each of whom empowers the others when they are defeated. Tsulong, a celestial dragon, alternates between a night phase where he must be fought and a day phase where players must heal him to purge his corruption. Lei Shi, a water spirit, uses a “Hide” mechanic that forces players to reveal her before she can be attacked. The final boss, Sha of Fear, dominates the battlefield with Breath of Fear, forcing players to remain within a protective circle to avoid being overwhelmed.
Throne of Thunder
- Players: 10/25
- Raid Finder Item Level Required: 480
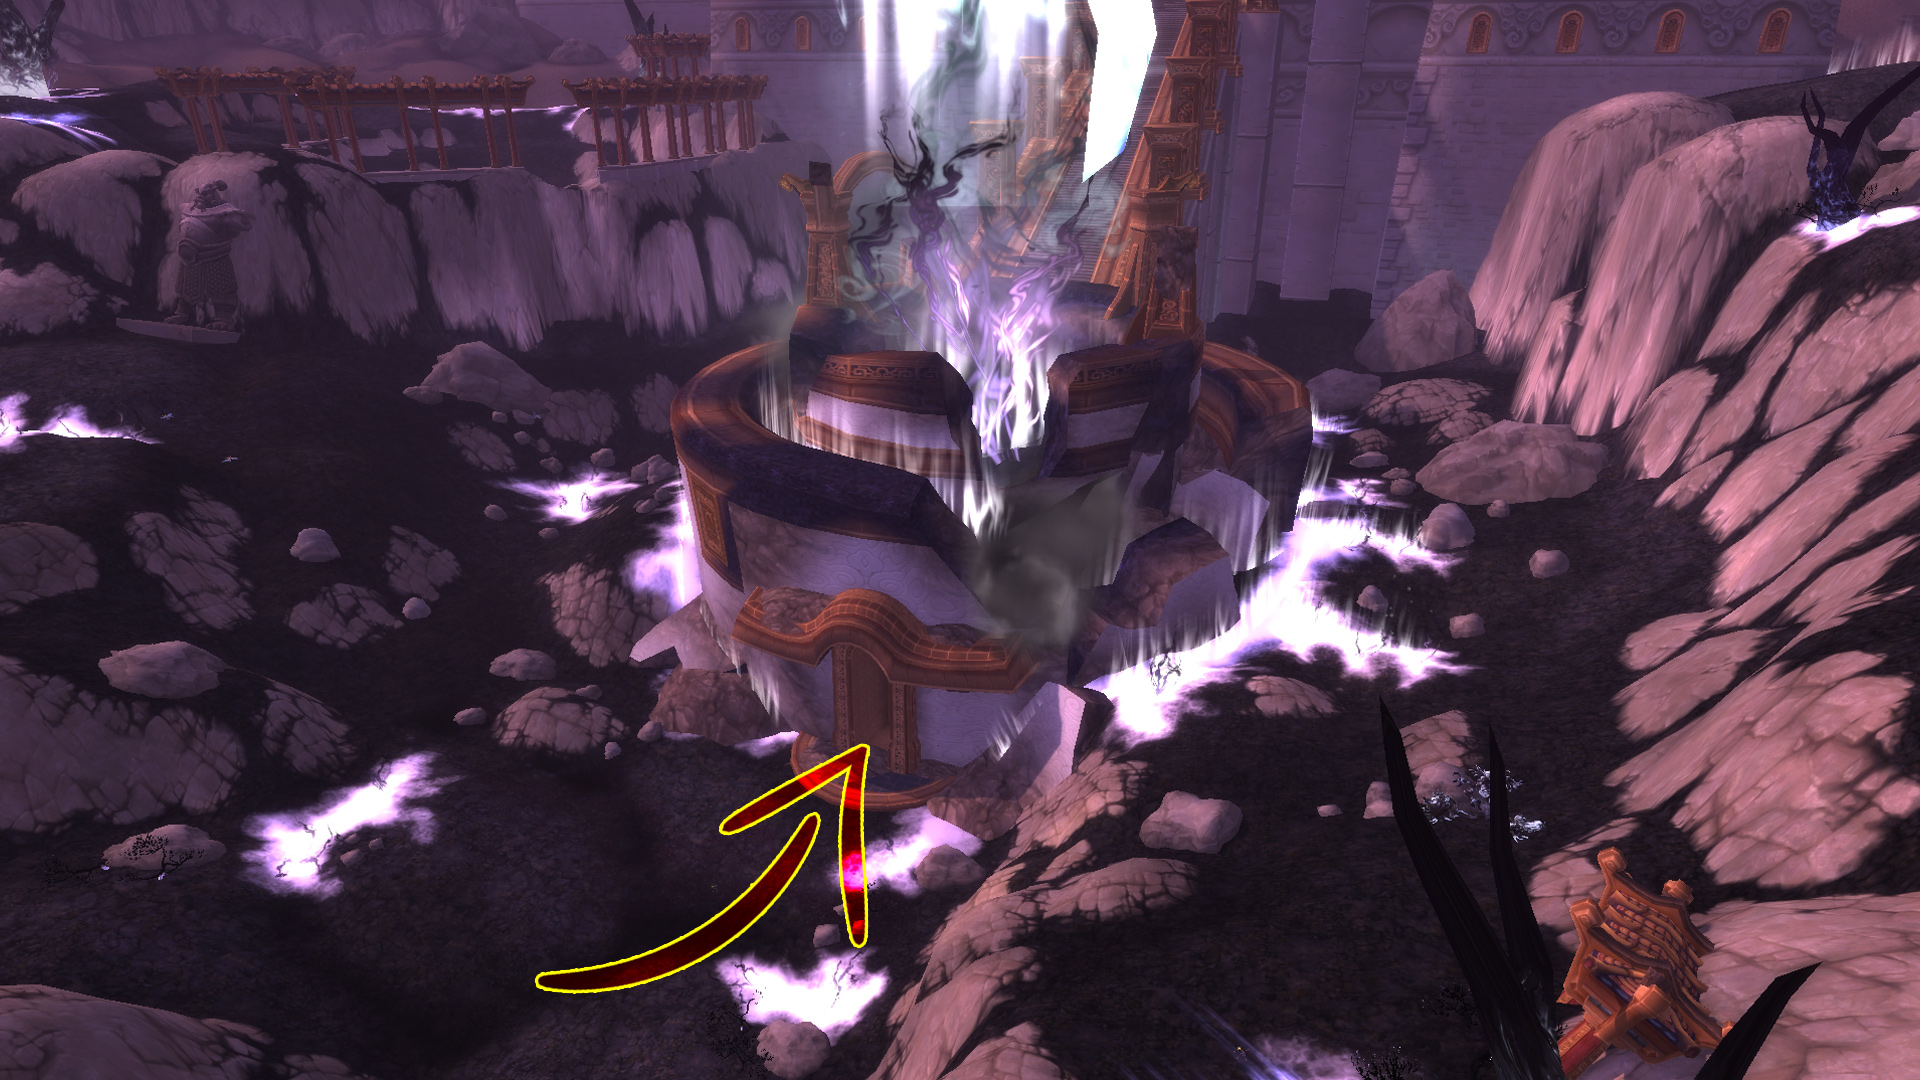
The Throne of Thunder, located on the Isle of Thunder, serves as the seat of power for Lei Shen, the Thunder King. This sprawling fortress is home to mogu warlords, horrific experiments, and powerful constructs.
The raid begins with Jin’rokh the Breaker, who creates electrified water pools that enhance damage while increasing incoming shock damage. Horridon, a massive warbeast, summons waves of troll reinforcements, each introducing new mechanics. Council of Elders, a group of empowered troll leaders, gain the power of the Loa, forcing players to interrupt their rituals. Tortos, a massive turtle, requires players to kick smaller turtles into him to interrupt his deadly Quake Stomp. Megaera, a hydra, spawns new heads with different elemental attacks as they are severed. Ji-Kun, a massive bird, forces players to navigate air currents to reach separate platforms.
Durumu the Forgotten, a floating eye construct, uses a deadly “maze” mechanic where players must find safe paths through darkness. Primordius, an experiment gone wrong, forces players to mutate by absorbing pools of corrupted blood to gain resistance. Dark Animus, an ancient mogu war construct, requires players to control a set amount of anima to activate and defeat it. Iron Qon, a mogu warlord, rides elemental quilen mounts, each introducing fire, frost, and lightning attacks. Twin Consorts, Lei Shen’s champions, alternate between night and day-based abilities. The final battle against Lei Shen, the Thunder King, involves controlling conduits that empower him while dodging deadly lightning-based attacks.

 (49.7, 68.7)
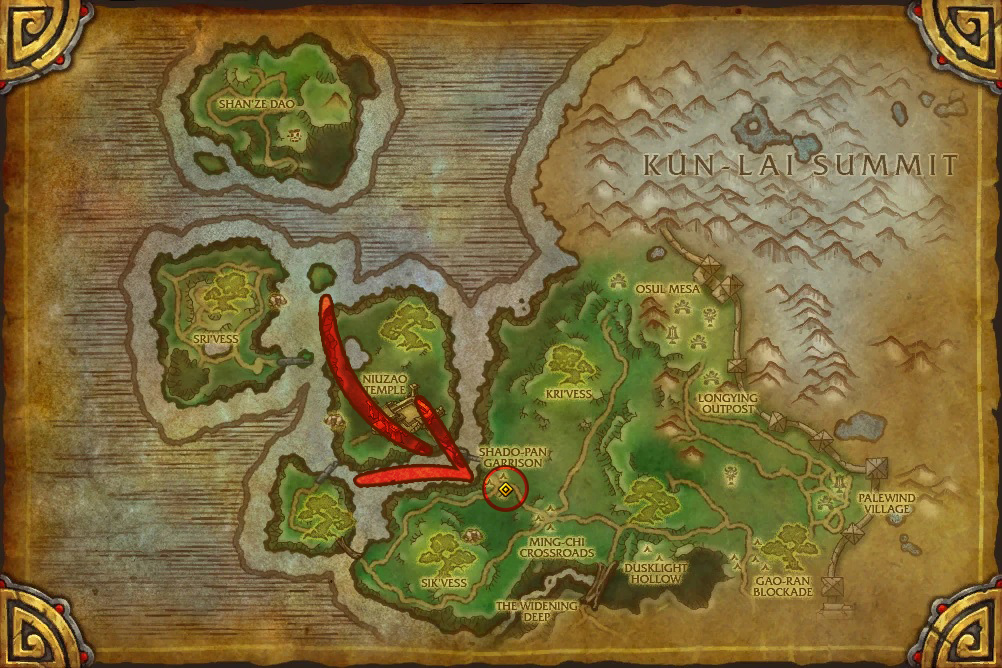
 (50.7, 73.4)
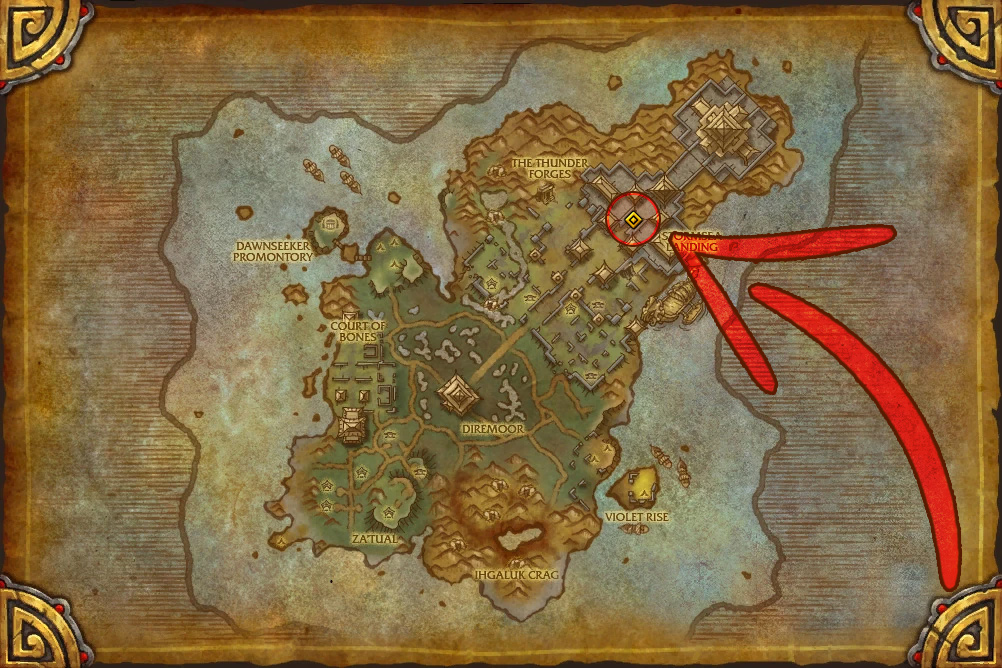
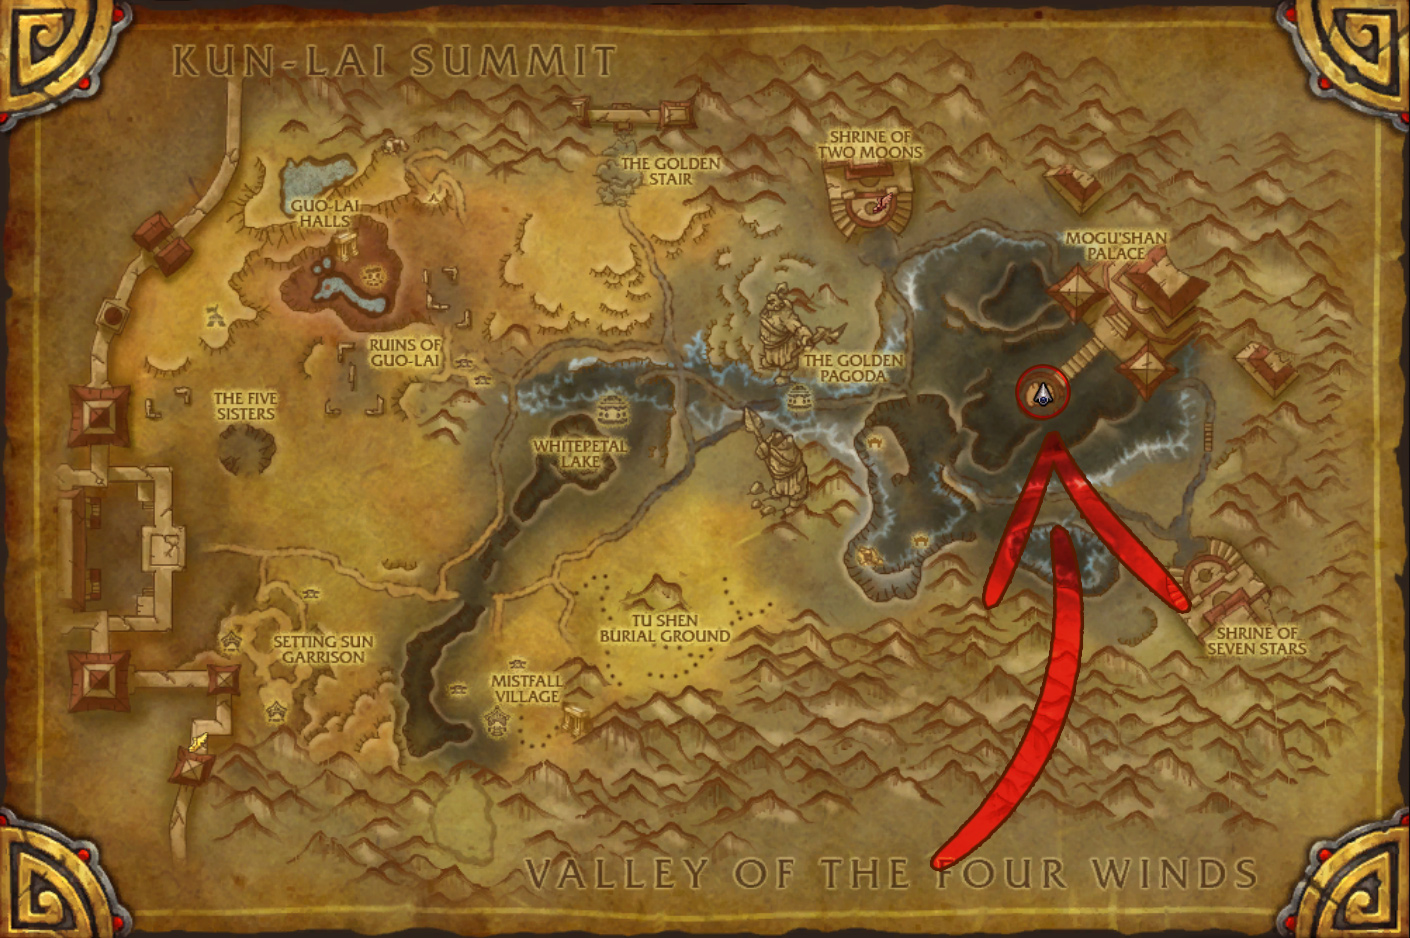
Siege of Orgrimmar
- Players: 10/25
- Raid Finder Item Level Required: 496
The Siege of Orgrimmar is the climactic raid of Mists of Pandaria, spanning multiple locations as players fight to overthrow Garrosh Hellscream, whose reckless ambition has led him to harness the power of the Old Gods.
The raid begins in the Vale of Eternal Blossoms with Immerseus, a water elemental that splits into dozens of smaller blobs, requiring players to purify them. The Fallen Protectors, three former guardians of Pandaria, fight together, reviving each other if not defeated quickly. Norushen tests players with a trial to remove their corruption before engaging Sha of Pride, whose corruption mechanic gradually overwhelms players. The raid then moves to Orgrimmar, where Galakras, a massive proto-drake, leads a siege that players must repel by capturing towers. Iron Juggernaut, a heavily armored war machine, bombards players with explosives and mines. Kor’kron Dark Shaman summon waves of corrupted elementals across Orgrimmar’s streets. General Nazgrim, a former Horde hero, fights with tactical precision, calling Kor’kron reinforcements and managing his rage to unleash powerful attacks.
The raid then descends into the underground chambers of Orgrimmar, where Malkorok, infused with Y’Shaarj’s power, fights with a constantly regenerating shield. Spoils of Pandaria presents a timed event where players open relics filled with various creatures and mogu artifacts. Thok the Bloodthirsty, a massive devilsaur, chases players relentlessly while its frenzy increases. Siegecrafter Blackfuse, a goblin engineer, uses conveyor belts to deploy powerful mechanical weapons. Paragons of the Klaxxi features a council fight where the Klaxxi champions, once allies, use insectoid abilities enhanced by Old God corruption. The final battle against Garrosh Hellscream is fought in multiple phases, with Garrosh using Y’Shaarj’s heart to gain immense power, corrupting the battlefield and pulling players into visions of the Old God’s influence. His defeat marks the end of his reign and the conclusion of Pandaria’s war.
Raids Overview – WoW Classic & Season of Discovery (SoD)
Luxrah • Updated June 7, 2025
This guide is an overview of the raids in World of Warcraft Classic, detailing group sizes, lockouts, bosses, and more. You can also check out our individual guides for each of the raids, which are linked in their sections below.
There are no difficulty levels or variable raid sizes in Vanilla WoW. Most raids have their own unique requirements for attunement before you can enter.
WoW Classic Raids
| Raid | Patch | Raid Tier | Group Size | Lockout |
|---|---|---|---|---|
| Onyxia’s Lair | 1.0.0 | Tier 1-2 | 40 | Weekly |
| Molten Core | 1.0.0 | Tier 1 | 40 | Weekly |
| Blackwing Lair | 1.6.0 | Tier 2 | 40 | Weekly |
| Zul’Gurub | 1.7.0 | – | 20 | 3 Days |
| Ruins of Ahn’Qiraj | 1.9.0 | – | 20 | 3 Days |
| Temple of Ahn’Qiraj | 1.9.0 | Tier 2.5 | 40 | Weekly |
| Naxxramas | 1.11.0 | Tier 3 | 40 | Weekly |
Classic Era Raids
Onyxia’s Lair
- Location: Dustwallow Marsh
- Tier: 1-2
- Raid Size: 40 players
- Lockout: Weekly
- Boss Encounters: Onyxia
Molten Core
- Location: Blackrock Mountain
- Tier: 1
- Raid Size: 40 players
- Lockout: Weekly
- Boss Encounters: Lucifron, Magmadar, Gehennas, Garr, Baron Geddon, Shazzrah, Sulfuron Harbinger, Golemagg the Incinerator, Majordomo Executus, Ragnaros
Blackwing Lair
- Location: Blackrock Mountain
- Tier: 2
- Raid Size: 40 players
- Lockout: Weekly
- Boss Encounters: Razorgore the Untamed, Vaelastrasz the Corrupt, Broodlord Lashlayer, Firemaw, Ebonroc, Flamegor, Chromaggus, Nefarian
Zul’Gurub
- Location: Stranglethorn Vale
- Raid Size: 20 players
- Lockout: 3 days
- Boss Encounters: High Priestess Jeklik, High Priest Venoxis, High Priestess Mar’li, Bloodlord Mandokir, Gri’lek, Hazza’rah, Renataki, Wushoolay, High Priest Thekal, Gahz’ranka, High Priestess Arlokk, Jin’do the Hexxer, Hakkar
Ruins of Ahn’Qiraj
- Location: Silithus
- Raid Size: 20 players
- Lockout: 3 days
- Boss Encounters: Kurinnaxx, General Rajaxx, Moam, Buru the Gorger, Ayamiss the Hunter, Ossirian the Unscarred
Temple of Ahn’Qiraj
- Location: Silithus
- Tier: 2.5
- Raid Size: 40 players
- Lockout: Weekly
- Boss Encounters: The Prophet Skeram, Lord Kri/Princess Yauj/Vem, Battleguard Sartura, Fankriss the Unyielding, Viscidus, Princess Huhuran, The Twin Emperors, Ouro, C’Thun
Naxxramas
- Location: Eastern Plaguelands
- Tier: 3
- Raid Size: 40 players
- Lockout: Weekly
- Boss Encounters: Anub’Rekhan, Grand Widow Faerlina, Maexxna, Noth the Plaguebringer, Heigan the Unclean, Loatheb, Patchwerk, Grobbulus, Gluth, Thaddius, Instructor Razuvious, Gothik the Harvester, The Four Horsemen, Sapphiron, Kel’Thuzad
Season of Discovery added three level-up raids to the game in the form of revamped dungeons.
In Phase 4, the first two raids of Vanilla World of Warcraft were added, as well as instanced versions of the Azuregos and Lord Kazzak world bosses. Phase 5 added two more Vanilla raids and an instanced version of Prince Thunderaan. Phase 6 brought another two Vanilla raids as well as the newly instanced Nightmare Grove, housing all four Dragons of Nightmare world bosses.
The reset days for twice a week resets are Tuesdays and Saturdays for North America and Europe, or Wednesdays and Sundays for Asia.
| Raid | Phase | Level | Group Size | Lockout |
|---|---|---|---|---|
| Blackfathom Deeps | 1 | 25 | 10 | 3 Days |
| Gnomeregan | 2 | 40 | 10 | 3 Days |
| The Temple of Atal’Hakkar | 3 | 50 | 20 | Twice a Week |
| Onyxia’s Lair | 4 | 60 | 20-40 | Twice a Week |
| Molten Core | 4 | 60 | 20-40 | Weekly |
| The Tainted Scar | 4 | 60 | 20-40 | Twice a Week |
| Storm Cliffs | 4 | 60 | 20-40 | Twice a Week |
| Zul’Gurub | 5 | 60 | 10-20 | Twice a Week |
| Blackwing Lair | 5 | 60 | 20-40 | Weekly |
| The Crystal Vale | 5 | 60 | 20-40 | Twice a Week |
| Ruins of Ahn’Qiraj | 6 | 6 | 10-20 | Twice a Week |
| Temple of Ahn’Qiraj | 6 | 6 | 20-40 | Weekly |
| Nightmare Grove | 6 | 6 | 20-40 | Twice a Week |
New Raids in Season of Discovery
Blackfathom Deeps
- Location: Ashenvale
- Level: 25
- Raid Size: 10 players
- Lockout: 3 days
- Boss Encounters: Baron Aquanis, Ghamoo-ra, Lady Sarevess, Gelihast, Lorgus Jett, Twilight Lord Kelris, Aku’mai
Gnomeregan
- Location: Dun Morogh
- Level: 40
- Raid Size: 10 players
- Lockout: 3 days
- Boss Encounters: Grubbis, Viscous Fallout, Crowd Pummeler 9-60, Electrocutioner 6000, Mechanical Menagerie, Mekgineer Thermaplugg
The Temple of Atal’Hakkar
- Location: Swamp of Sorrows
- Level: 50
- Raid Size: 20 players
- Lockout: Twice a week
- Boss Encounters: Atal’alarion, Festering Rotslime, Dreamscythe and Weaver, Atal’ai Defenders, Jammal’an and Ogom, Morphaz and Hazzas, Shade of Eranikus, Avatar of Hakkar
The Tainted Scar
- Location: Blasted Lands
- Level: 60
- Raid Size: 20-40 players
- Lockout: Twice a week
- Boss Encounters: Lord Kazzak
Storm Cliffs
- Location: Azshara
- Level: 60
- Raid Size: 20-40 players
- Lockout: Twice a week
- Boss Encounters: Azuregos
The Crystal Vale
- Location: Silithus
- Level: 60
- Raid Size: 20-40 players
- Lockout: Twice a week
- Boss Encounters: Prince Thunderaan
The Nightmare Grove
- Location: Ashenvale, Duskwood, Feralas, or The Hinterlands
- Level: 60
- Raid Size: 20-40 players
- Lockout: Twice a week
- Boss Encounters: Emeriss, Lethon, Taerar, and Ysondre
WotLK Raids
![]() Nevermore • Updated June 7, 2025
Nevermore • Updated June 7, 2025
Welcome to our raid list for World of Warcraft: Wrath of the Lich King!
Every raid has a level requirement but, compared to the dungeons, raids do not have item level requirements. Instead, these instances come with challenges that can only be accomplished with the proper tools.
With Wrath of the Lich King, each raid comes in 4 different versions. Players can now tackle raids as a 10-man group or a 25-man group, with the option of either Normal or Heroic variant for each specific format. The latter choices in both categories yield higher rewards.
In the sections below, we will cover some crucial information for each Raid, a bit of the lore that encompasses each location, and the entities found inside them. The list might seem intimidating at first, but remember: when adventurers meticulously prepare themselves to face each challenge, they are granted the great promise of legendary, forgotten rewards.
Gather your closest allies, storm and conquer these epic places, and claim your spoils!
WotLK Raids List
| Raid | Patch | Loot Item Level | Raid Tier |
|---|---|---|---|
| Naxxramas | 3.0.3 | 200-226 | Tier 7 |
| The Eye of Eternity | 3.0.3 | 213-226 | Tier 7 |
| Vault of Archavon | 3.0.3 | 200-270 | Tier 7-Tier 10 |
| Obsidian Sanctum | 3.0.3 | 200-226 | Tier 7 |
| Ulduar | 3.1.0 | 219-239 | Tier 8 |
| Trial of the Crusader | 3.2.0 | 232-258 | Tier 9 |
| Onyxia’s Lair | 3.2.2 | 232-245 | Tier 9 |
| Icecrown Citadel | 3.3.0 | 251-284 | Tier 10 |
| The Ruby Sanctum | 3.3.5 | 258-284 | Tier 10 |
Naxxramas
- Location: Dragonblight, The Carrion Fields
- Item Level: 200-226
- Boss Encounters: Anub’Rekhan, Grand Widow Faerlina, Maexxna, Noth the Plaguebringer, Heigan the Unclean, Loatheb, Instructor Razuvious, Gothik the Harvester, Patchwerk, Grobbulus, Gluth, Thaddius, Sapphiron, Kel’Thuzad
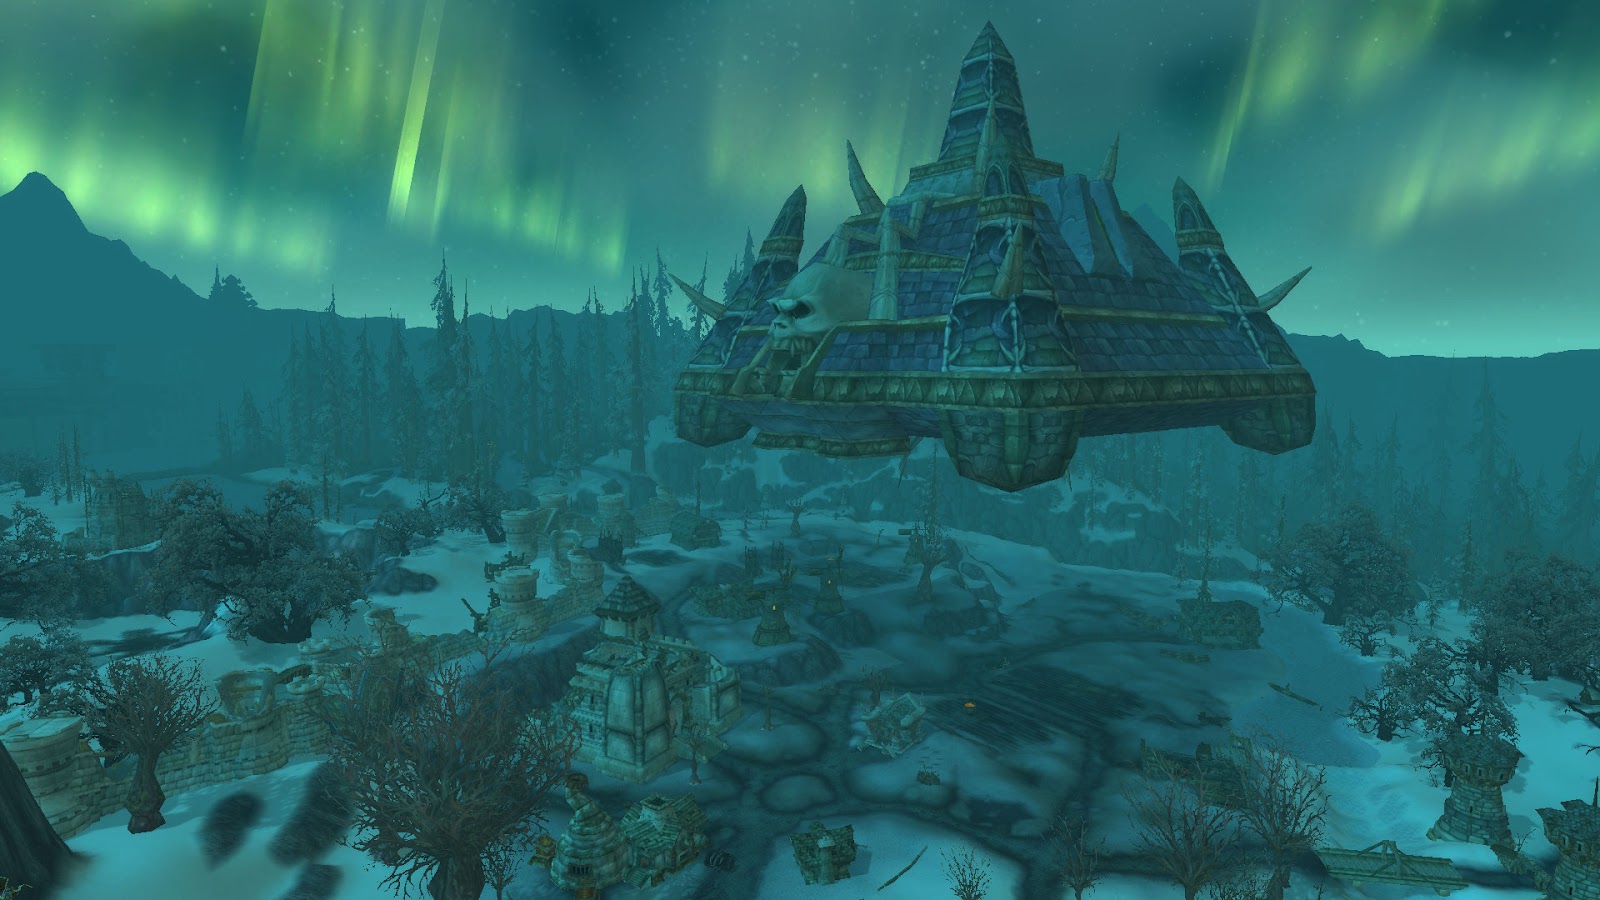
Once an ancient Nerubian ziggurat found inside the mighty empire of Azjol-Nerub, Naxxramas was stormed by Anub’arak along with an undead army. Initially, this was a raid available for players in the first release of World of Warcraft, and now the iconic necropolis made its comeback in Wrath of the Lich King.
The great floating citadel of Naxxramas plagues the lands of Dragonblight, as it once decimated the surroundings of Stratholme. Harboring countless evil denizens and grotesque abominations bound to the will of the Lich King, this eerie location is the first to be encountered by our adventurers.
Naxxramas is considered the entry-level raid of the Wrath of the Lich King expansion. The instance comprises 5 distinct quarters, the first 4 representing the initial challenge of the raid.
Because the first 4 quarters do not come with a linear path, the players have full freedom to choose which quarter they wish to start with. However, each one comes with a set layout, with no opportunity to skip any of the bosses.
The raid serves as the first benchmark for teamwork, planning, and strategic organization.
After battling through the hordes of undead, mighty abominations, and corrupted fallen heroes, the fifth and final quarter of the raid is unlocked to our adventurers — the Frostwyrm Lair. The Lair is where the mighty dragon Sapphiron stands to test the intruders before allowing passage to Kel’Thuzad, the obedient servant of the Lich King and the master of the floating citadel itself.
The Eye of Eternity
- Location: Dragonblight, Coldarra (Inside the Nexus)
- Item Level: 213-226
- Boss Encounters: Malygos
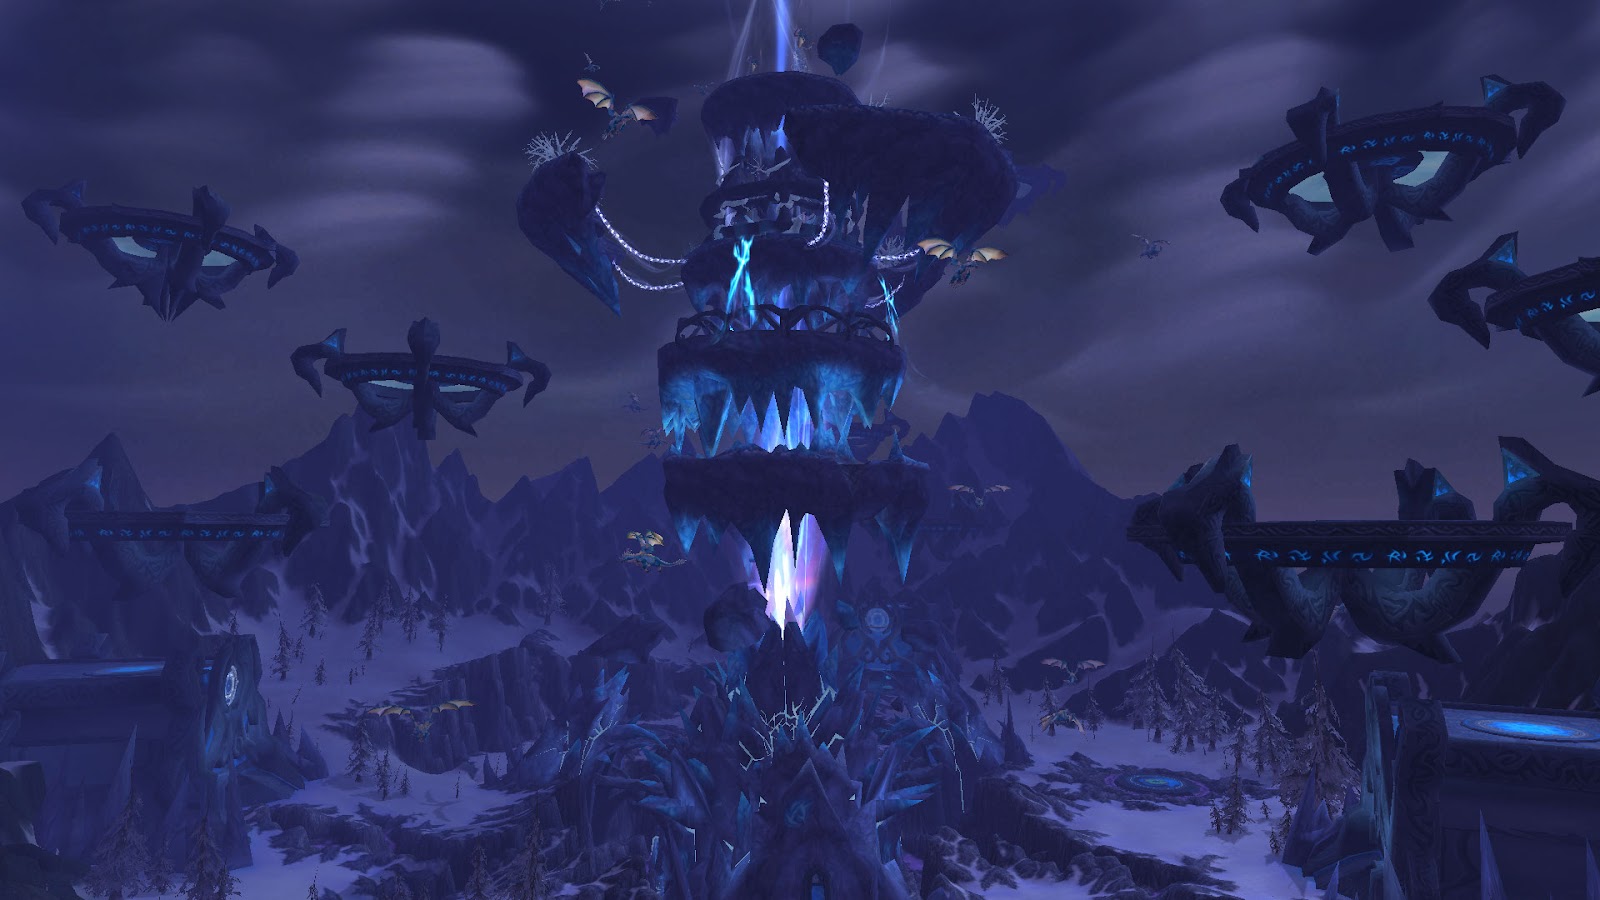
A vast and incomprehensible structure looms over Coldarra. The Nexus is a place that not only houses the meeting point of all the Ley-Lines found throughout the world, but also the mighty Dragon Aspect of Magic, Malygos.
Obsessed with the fact that mortals possess the ability to wield and bend magic to their will, Malygos believes that all the misdeeds of the world are caused by this malpractice. Thus, Malygos seeks to purge those who dare to practice the art of magic and seize control over it all himself. Being informed of this imminent threat, our adventurers are tasked with ending the peril that seeks to end the magical world.
The Eye of Eternity works similarly to the Onyxia raid, being a hub of only one powerful entity — the only boss encounter present in the raid being Malygos himself. The adventurers will have to tread carefully when facing the powerful Aspect of Magic. This boss involves 3 different phases, each of them displaying vast arcane prowess and several room-altering effects.
However, you should not feel terror in the face of the mighty Aspect, since you will receive the aid of Alexstrasza throughout the whole fight, helping make Malygos the first Dragonflight aspect to ever be slain.
Vault of Archavon
- Location: Wintergrasp, Wintergrasp Keep
- Item Level: 200-270
- Boss Encounters: Archavon the Stone Watcher, Emalon the Storm Watcher, Koralon the Flame Watcher, Toravon the Ice Watcher
Wintergrasp is one of the most contested territories of Northrend, serving as a strategic hub for any faction that holds it. Within it, the Wintergrasp Keep is the mighty fortress that stood tall against countless sieges and battles throughout the ages.
Besides being a strategic hub, Wintergrasp Keep houses a dark secret deep within its walls, the Vault of Archavon. The marvelous titan structure hides within it many unclaimed treasures, and the quick spread of such rumors attracted even more battles to this region, hoping to unravel the unclaimed treasures lost many ages ago.
Once the keep is claimed, adventurers can explore the hidden structure. Within it, you can find strong unbound elementals, marvelous architecture, and 4 intimidating giants known as the Watchers — the bosses of the raid.
Each Watcher can be targeted separately, since there is no requirement to slay them in a particular order. The Watchers stay true to their name, and each of them will display powers related to their domain.
The tactics for this raid are pretty straightforward: you have to treat the boss encounters as a DPS race, with several adds that need to be killed.
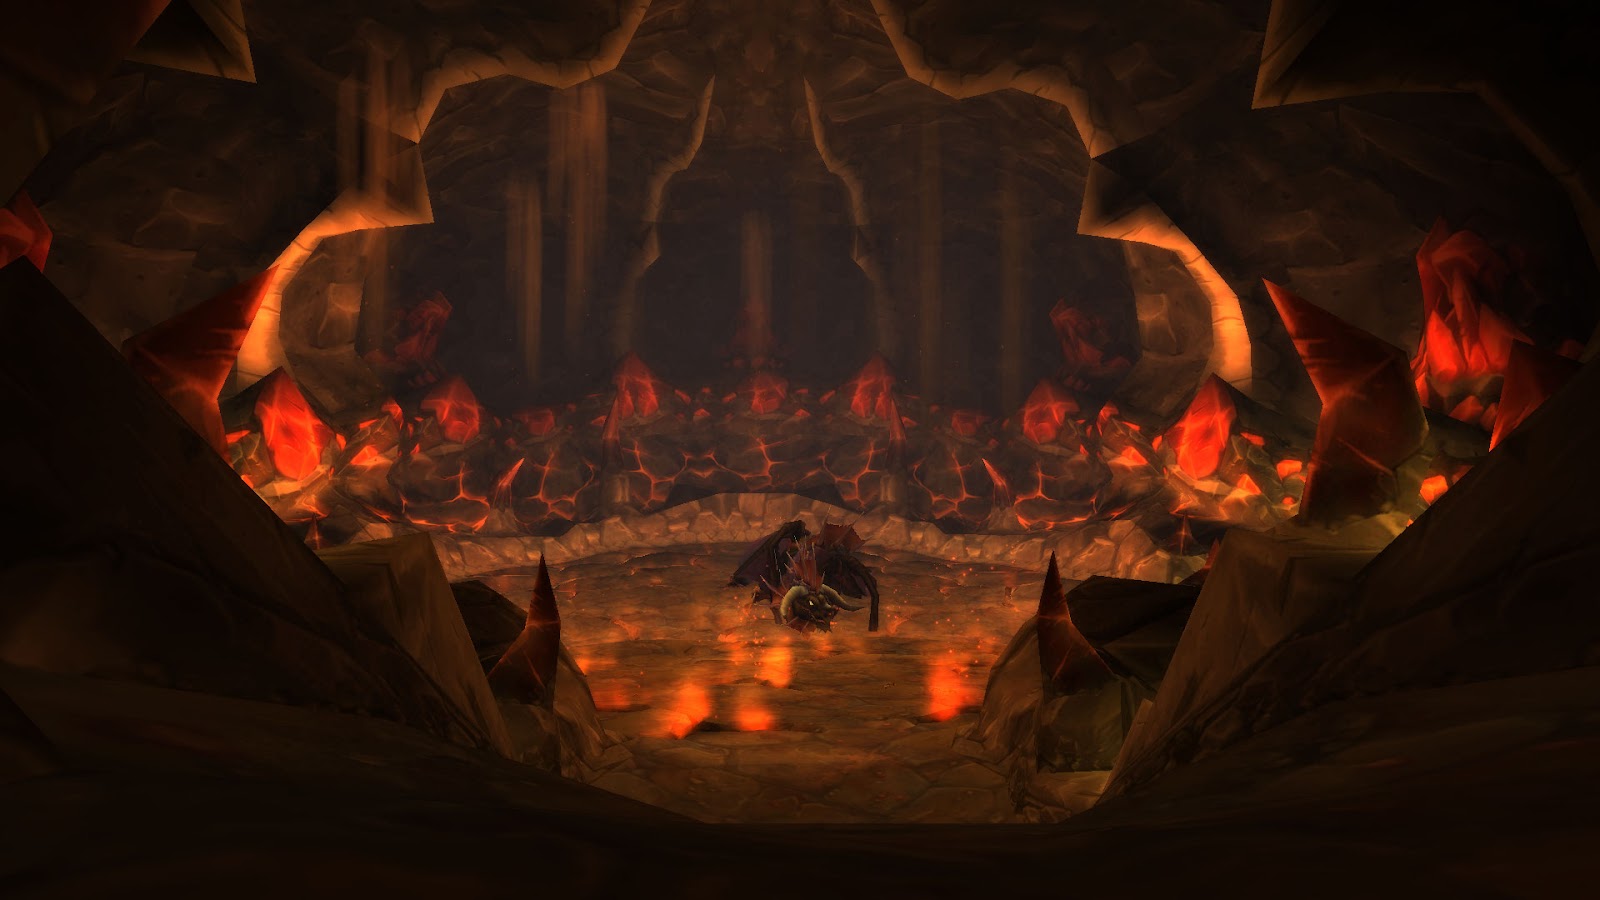
Obsidian Sanctum
- Location: Dragonblight, Wyrmrest Temple
- Item Level: 200-226
- Boss Encounters: Sartharion
Yet another mystical place can be accessed through the portals under the Wyrmrest Temple — the Obsidian Sanctum. It houses several dragonkin entities, among which we can find the mighty dragon Sartharion.
The Obsidian Sanctum was used by the Black Dragonflight as a hidden chamber, a part of the Chamber of Aspects in which they settled quarrels and meticulously planned their moves. It was hidden far from the rest of the Dragonflight.
The raid itself brings our adventurers to a molten realm, filled with monstrous dragons awaiting to feast upon their flesh.
The layout of the raid is quite small but is packed with mobs. Your first option is to directly engage Sartharion but risk the wrath of the rest of the dragonkin within the chamber. Alternatively, you can strategically remove the two mini-bosses along with their guardians, found on each ridge above Sartharion, before engaging him.
The boss itself is not too hard to slay, but players should be aware that Sartharion possesses a one-shot mechanic for those that do not pay attention. If you are familiar with the childhood game “the floor is lava”, then you have an idea of what awaits you.
Ulduar
- Location: Storm Peaks
- Item Level: 219-239
- Boss Encounters: Flame Leviathan, Ignis the Furnace Master, Razorscale, XT-002 Deconstructor, The Assembly of Iron, Kologarn, Auriaya, Hodir, Thorim, Freya, Mimiron, General Vezax, Yogg-Saron, Algalon the Observer
The Titans have left many constructions and safe havens around the world. Some of their primary facilities, like Uldum and Uldaman, house many secrets possessively protected from the eyes of any ill-doer. However, none of them are quite like Ulduar.
Ulduar is a vast stronghold, a prison to one of the most dangerous entities that can be found on Azeroth, the Old God Yogg-Saron. Uldar was found because of the continuous efforts of Brann Bronzebeard in uncovering the ancient dwarven legacy and their connection to the Titans. It houses many unknown creatures that have been mere whispers and rumors to the normal denizens of Azeroth.
In their siege upon Ulduar, our adventurers will discover hidden truths about the world and how the eldritch horror, Yogg-Saron, has manipulated many events of the world and corrupted once noble beings that were meant to protect life, ultimately resulting in them seeking to destroy it.
The raid layout is rather impressive, compared to the previously available raids. The sheer magnitude of it and unique mechanics bring a fresh and innovative way to the concept of raiding. Finding their way through Ulduar, players will have to utilize vehicles, explore the vast corridors of the prison, meet otherwordly beings, and ultimately fight one of the greatest deceivers that is seeking to imprison the entire Azeroth within his grasp.
You will have to follow a somewhat linear layout, with each part of Ulduar being guarded by various bosses. The first 4 bosses will be guarding the external part of the raid, while the others will be residing inside. After clearing out each section of the stronghold, you will receive access to portals to navigate easily through the instance.
Ulduar is a little unique compared to other raids: to access the Heroic difficulty of the raid, players would have to start each encounter in a specific manner to get access to its “Hardmode”. An example of this would be defeating Thorim’s gauntlet in less than 3 minutes.
Hidden deep within there is one notable secret that can be accessed with a special key. After opening the door, you will be greeted by a mysterious cosmic being, one that has quite an unnerving purpose. We recommend you to seek this being to find out what potential threat his encounter may bring and the special praise that you might receive if you survive this encounter.
The last boss encounter of Ulduar is Yogg-Saron himself. The deceiver stands true to his name, initially presenting himself as Sara, a vrykul woman that is then promptly revealed as an avatar of Yogg-Saron. True to the nature of his lore, the fight itself employs a special mechanic. The adventurers will be forced to fend off the madness that is inquired only by sighting this grotesque entity.
Trial of the Crusader
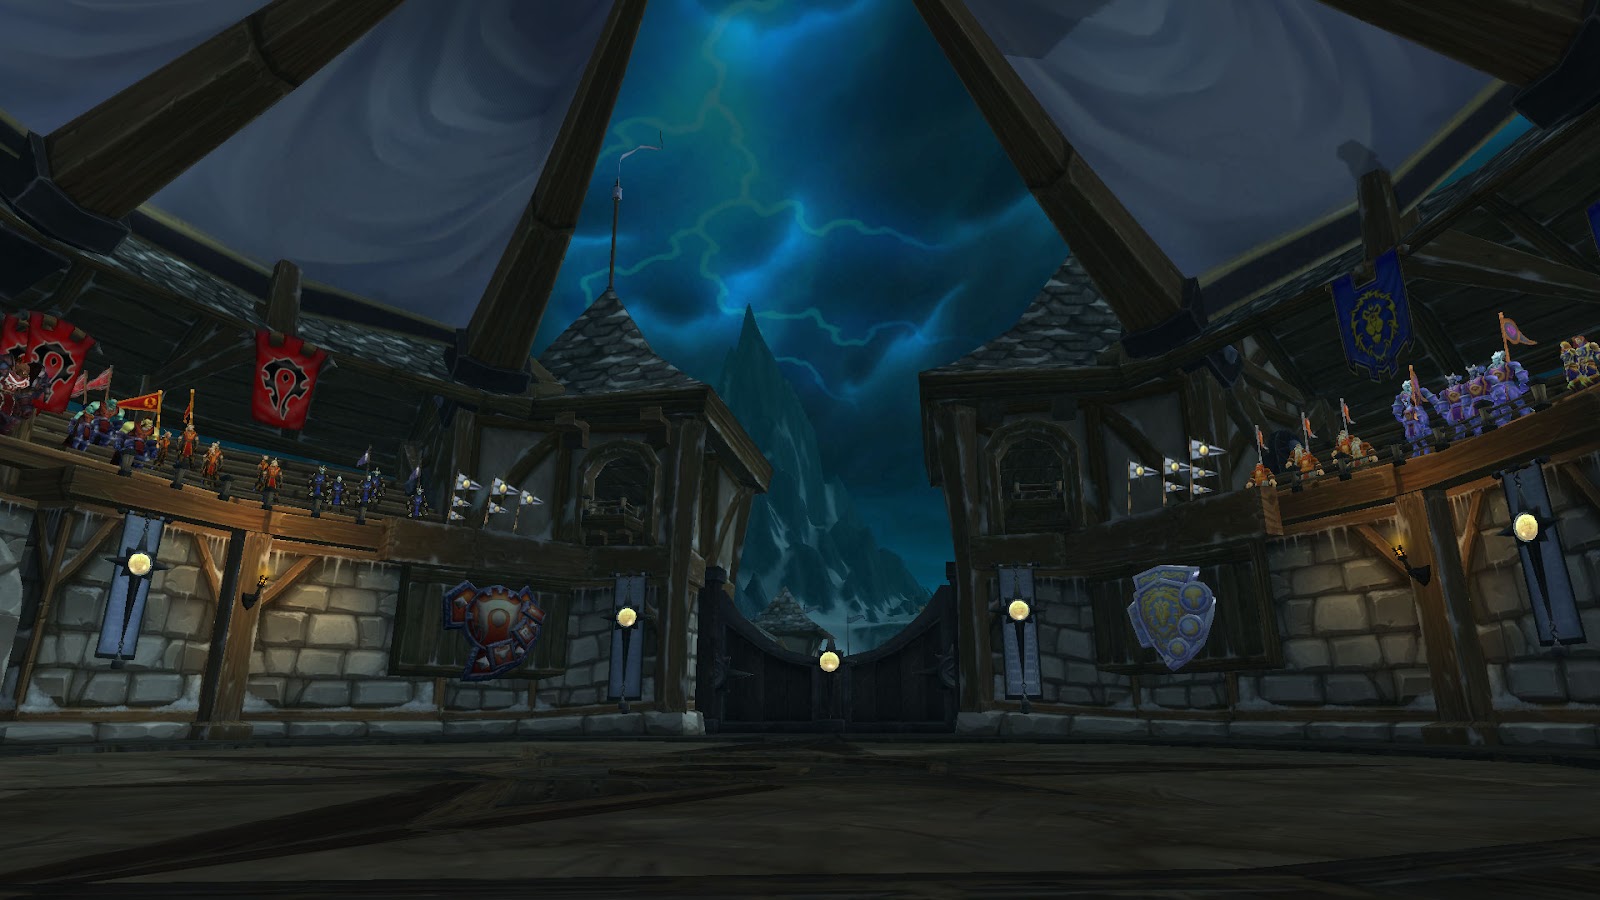
- Location: Icecrown, Argent Tournament Grounds
- Item Level: 232-258
- Boss Encounters: The Northrend Beasts, Lord Jaraxxus, Champions of the Alliance, Champions of the Horde, Twin Val’Kyr, Anub’arak
After the battle that took place at Light’s Hope Chapel, the Ashen Verdict was created as an alliance between the Argent Crusade and the Knights of the Ebon Hold. This alliance resulted in a movement and a promise, to once and for all bring the demise of the Lich King.
One of the first major events that resulted in this alliance was the deployment of troops all around Northrend, with Icecrown being a target of special importance. This undertaking resulted in the forming of the Argent Tournament Grounds, a place where future crusaders of the Ashen Verdict would train and celebrate the rise of the movement.
The Trial of the Crusader is a raid that came into being as a result of the previous efforts of this alliance, with both Horde and Alliance being invited to take part in this event. With the Argent Tournament Grounds serving as its safe haven, the purpose of the Tournament was to recruit the strongest heroes in order to form the first line against the Lich King.
The raid comprises several trials against willing participants, each of the participating adventurers seeking to gain the approval of their faction’s leaders. The boss encounters consist of dangerous captured beasts, an awry ritual that went entirely wrong resulting in the liberation of a powerful demonic entity, champions of the opposite factions seeking to test the adventurers and prove that they can be slain easily, two captured Val’Kyr’s of the Lich King, and one… unplanned event.
This unplanned event involves the Lich King visiting the tournament himself, mocking the efforts of both factions and of the Ashen Verdict, followed by the destruction of the colosseum and the reveal of a sinister plot. Adventurers are suddenly forced to face an unexpected threat, the former Nerubian king, Anub’arak, once again resurrected by the Lich King to do his bidding.
The raid has a linear pattern, with each boss encounter released upon the players in a sequence. The Heroic version of the raid requires diligent planning and tactical maneuvering from the players.
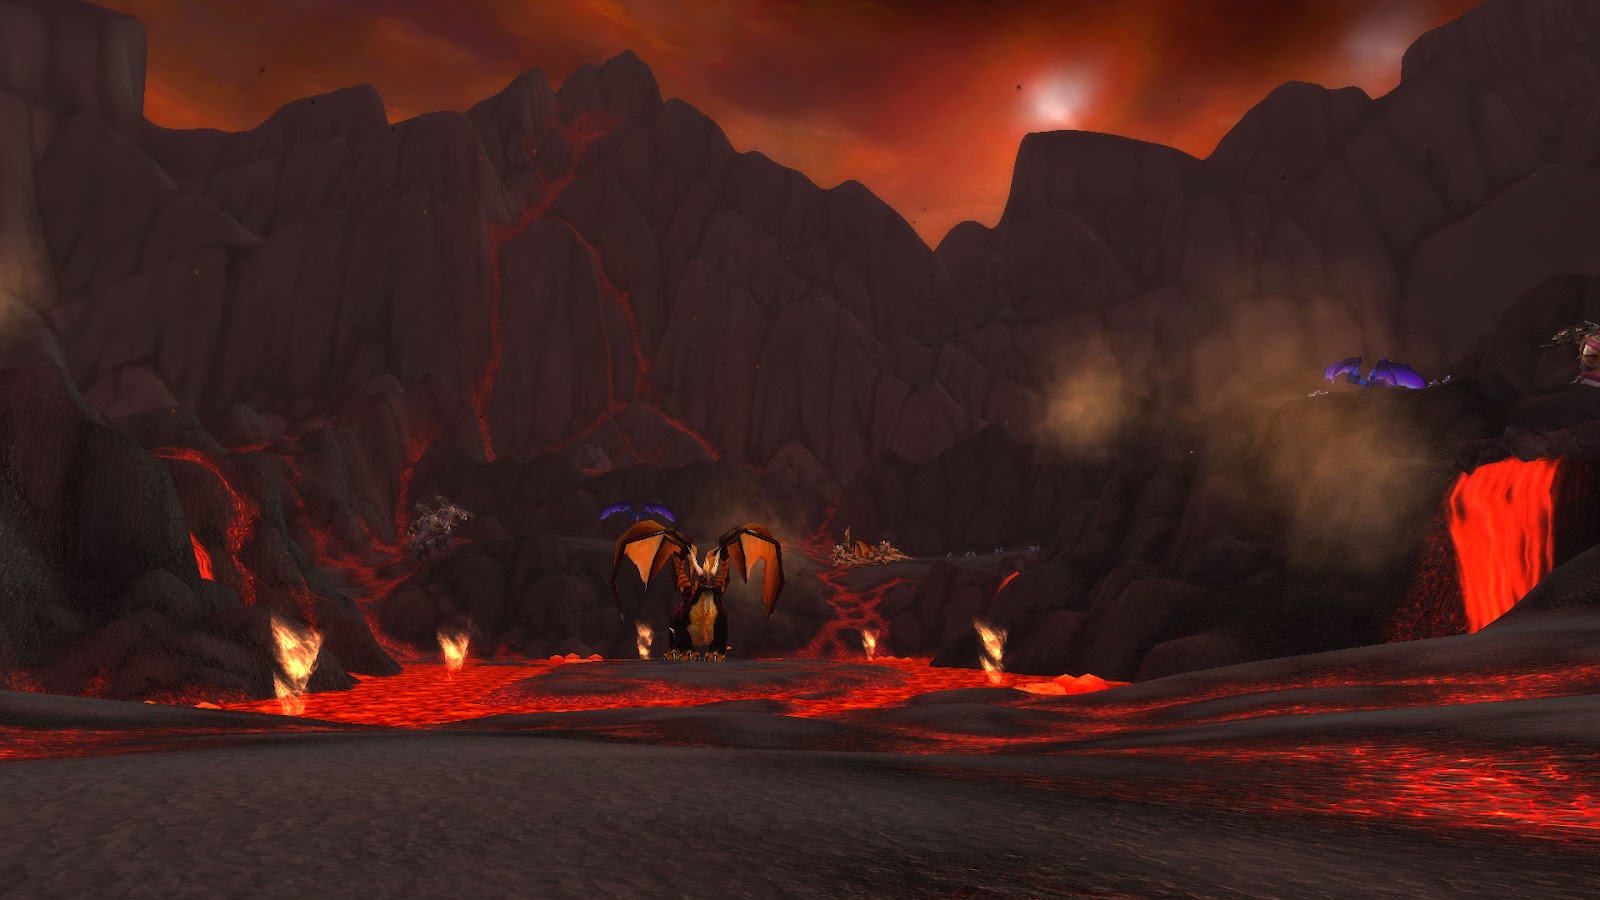
Onyxia’s Lair
- Location: Dustwallow Marsh, Wyrmbog
- Item Level: 232-245
- Boss Encounters: Onyxia
Onyxia’s Lair, in a way similar to The Eye of Eternity, houses one of the most powerful dragons that has ever existed in the land of Azeroth. As one of the greatest deceivers that broke our hearts in the previous version of the game, Onyxia mercilessly tackles any adventurer that dares enter her lair.
With her being the sole target of the raid, our adventurers get the chance to once again fend off her endless brood, battle through ravaging flames, and ultimately claim her head.
The boss encounter consists of 3 main phases. In the first phase you will have to deal with the mighty dragon on the molten floor that encompasses the lair. In the second, you will be fighting off Onyxia’s brood while also trying to survive the fiery onslaught.
Lastly, as the great dragon descends, you will have to attempt to bring her down once and for all while continuously avoiding the lava explosions coming from her fierce roars.
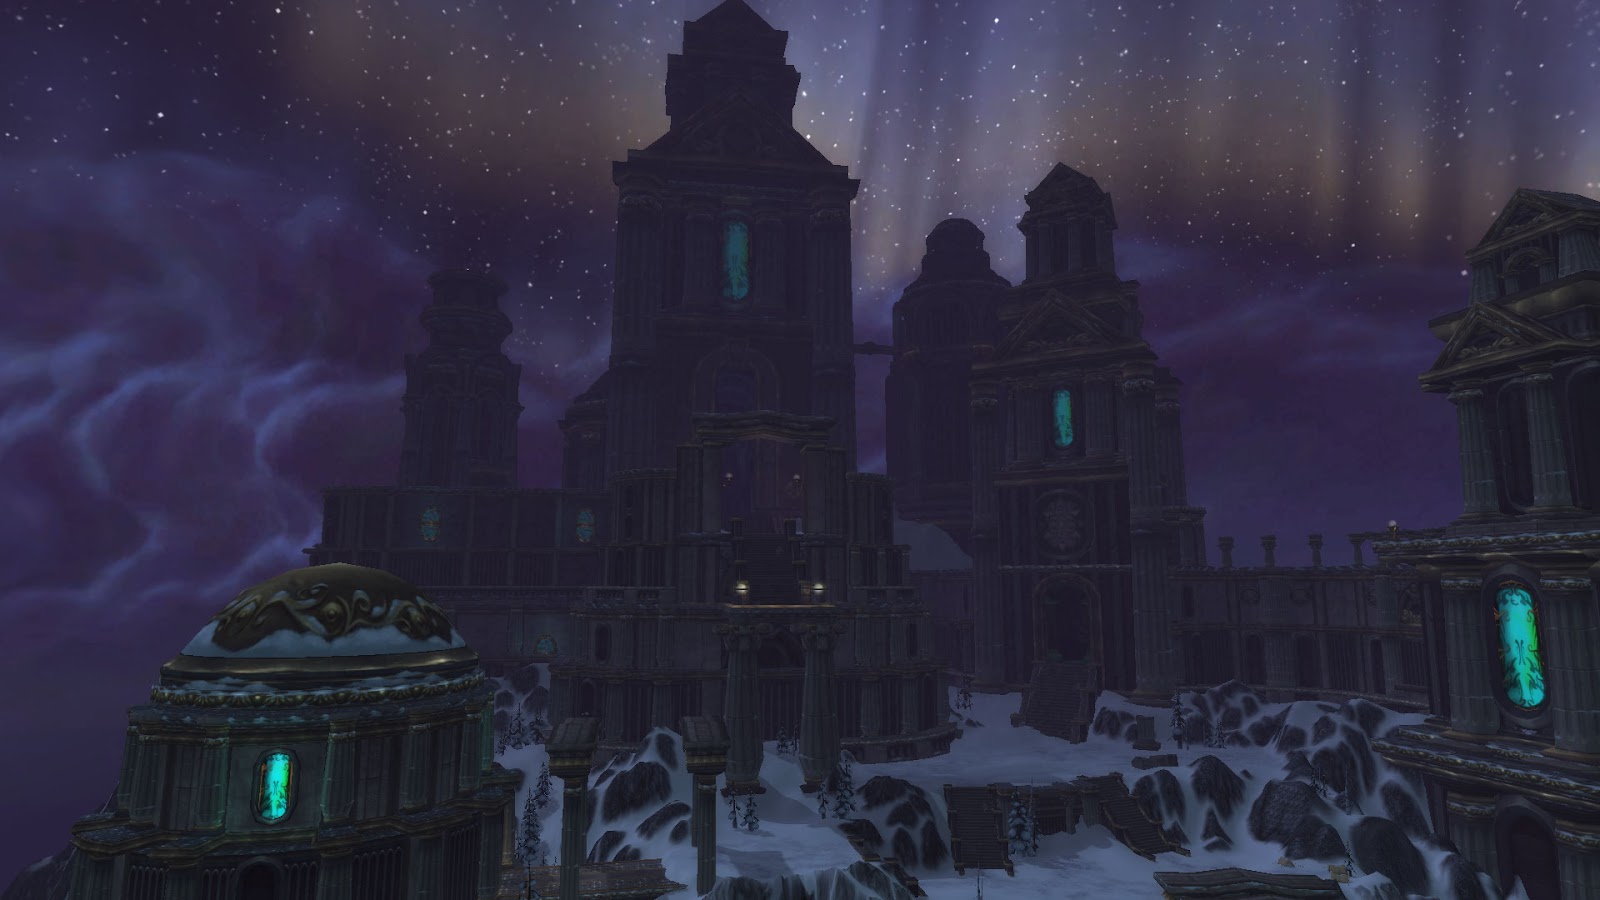
Icecrown Citadel
- Location: Icecrown
- Item Level: 251-284
- Boss Encounters: Lord Marrowgar, Lady Deathwhisper, Icecrown Gunship Battle, Deathbringer Saurfang, Festergut, Rotface, Professor Putricide, Blood Prince Council, Blood-Queen Lana’thel, Valithria Dreamwalker, Sindragosa, The Lich King
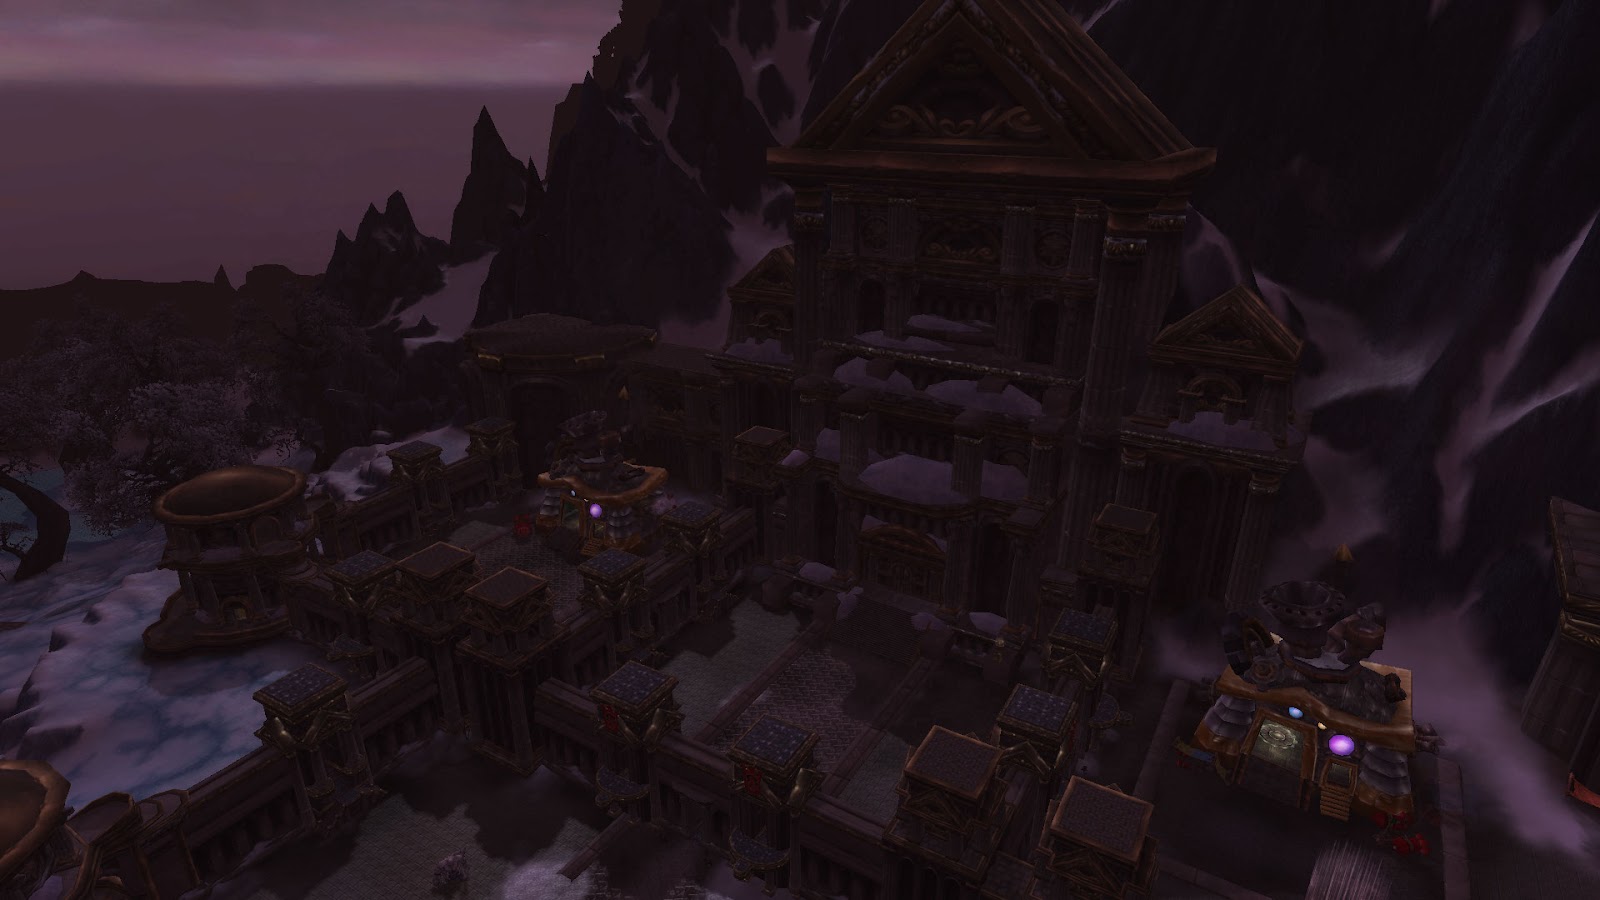
Icecrown Citadel represents the last bastion of the Scourge, a mighty fortress that stands imposing amidst the lands of Icecrown. Its entryway is defended by several gates which span a countless sea of undead. Icecrown Citadel instills fear and horror in anyone who dares look at it, making the option of a simple siege upon the fortress seem utterly impossible. If not the terrifying architecture of the fortress itself, the countless sea of the undead that stand ready to defend it at any moment incite daunting thoughts for anyone who plans to approach it.
The citadel itself is built from Saronite, the very blood of Yogg-Saron. This material is known to cause severe madness in anyone that stays too much in its presence. From time to time, adventurers that showed the grit to fight off the hordes of the undead spread rumors of how these undead silently whisper chants about the Old God.
The raid presents itself as a final chapter to one of the most beloved stories in videogame history, allowing the players to witness and participate in the ultimate demise of Arthas, the Lich King.
Icecrown Citadel is sectioned into different quarters, each of them showcasing the might of the Scourge. The citadel itself is filled to the brim with horrors that would mentally break even the most seasoned of warriors: the countless undead and magical beings that defy the laws of the world.
Each quarter comes with a clear theme, starting with the very base of the Frozen Throne being defended by Lord Marrowgar, to the Halls of Necromancy where Lady Deathwhisper manages the Cult of the Damned. The Plague quarters is where Professor Putricide creates monstrous abominations to serve the Lich King, while the Blood quarters serve as a home to the enigmatic Blood-Queen. Lastly, the Frost Quarters is the resting nest of Arthas’s mightiest creation, the resurrected dragon Sindragosa.
After battling through the initial halls of the citadel, you can tackle any of the three different quarters, in any order you desire. However, one popular choice for most groups is to start with the Plague quarters, in order to assess the capabilities of their group.
After battling through endless waves of undead, joined by terrifying horrors and otherworldly beings, our adventures are greeted by the opening of a portal that enables them to visit the Frozen Throne itself, the place from which Arthas commands his vast forces. Being aided by Tirion Fordring, our adventurers finally face the Lich King in one of the most enticing and tough battles that they could have imagined.
Icecrown Citadel’s boss encounters require an impressive number of tactics and practice in order to claim the victory. The Heroic difficulty of the raid brings one of the most esteemed achievements in World of Warcraft’s history, The Light of Dawn.
The Ruby Sanctum

- Location: Dragonblight, Wyrmrest Temple
- Item Level: 258-284
- Boss Encounters: Halion
The last raid added in WotLK, The Ruby Sanctum is similar to the Obsidian Sanctum or The Eye of Eternity. It is a sanctum of one of the most powerful dragon entities that can be found in the expansion.
The Ruby Sanctum is home to Halion the Twilight Destroyer, a powerful entity calling himself the Herald of Deathwing. Claiming to be Deathwing’s general, he was sent by the Aspect to steal the eggs of the Red Dragonflight along with his three lieutenants.
The Sanctum was used by the Red Dragonflight as storage and a safe haven for their eggs, but now it is threatened by Halion’s assault. Upon receiving this news, adventurers have come from far and wide to safeguard the Ruby Sanctum with the promise of great rewards.
The Ruby Sanctum’s layout comprises 3 mini-boss fights. Our adventurers will have to face off Halion’s lieutenants first before engaging the Twilight Destroyer.
Hallion himself will be a hard fight for an inexperienced adventurer, the boss presenting himself with 3 different battle phases, requiring a plethora of tactics to be taken into account. The second phase can be especially daunting because of the Twilight Cutter. However, with practice, adventurers can find the key to success.
Hallion offers the players some of the most rewarding items for the end of the expansion, granting noticeable improvements to any player who conquers the Sanctum.
I can’t wait to raid in Ulduar at level. I was a Wrath baby, so I didn’t do much raiding until Cata. But man the fun we had.